


Fitting an extractor fan
This is something I did the other day, and it’s a lot easier than I thought it was going to be.
About a week after we moved in (about a year ago) we used the extractor fan on our cooker hood but didn’t see a great deal of effect from it. When I got out the stepladder and looked above the cooker the extractor fan was expelling air straight out the top! It was a cooker extractor fan designed to be used with an external vent, but the previous owners hadn’t bothered to fit an external vent. We stopped using it over the summer, but it’s been on the to-do list ever since, and now that’s it’s getting colder has been jumped to the top of the list.
Firstly, I didn’t cut the hole myself. If you look at any of the extractor fan kits – the hole is at least 100mm wide. That’s pretty big in DIY terms. It’s certainly SDS drill country, and probably specialised drill-bit territory. Of course, you can drill several smaller holes and chisel it all out, but have you seen the thickness of an exterior wall? In our Victorian terrace it’s considerable. I’d previously drilled a 20mm hole for the garden tap and that nearly broke my (non SDS) drill, so I knew it was time to get help. In the end a plumber did it for me with a single diamond-core drill bit. This also meant a LOT less dust: he drilled a single pilot hole from the kitchen side out, then drilled back in the other way, so all the dust was on the outside. Make sure to leave sufficient height between the cooker outlet and where the hole goes – bend the pipe into a 90 degree shape first to see how much space it needs and use that to determine where your hole should go.
 Originally, I had bought a 120mm extractor kit. These consist of the metal flexible pipe, an external fitting with the flappy vents, some screws to fit it and a jubilee clip to attach the pipe to the external fitting. I also bought a 120mm piece of pipe: my thinking was that I didn’t want to rip the fan pipe on the brickwork, so I’d use this thick poly pipe as a conduit.
First problem was that the largest drill-bit my plumber had wasn’t quite 125mm…which would have been about perfect. It was probably about exactly 120mm.
I don’t know if it’s my computer science background where things can be made to work together pretty easily, but in DIY I continually forget that you can’t mix and match things of the same dimensions and just expect them to work. My 120mm extractor kit pipe didn’t fit inside my 120mm conduit pipe, and it was looking like neither would fit inside the 120mm hole.
A 100mm version of the extractor kit exists, so I bought that as well (ScrewFix love me!). Now I had a 100mm pipe and a 120mm hole – not ideal. I discovered though that the 120mm pipe sort of, maybe, just about, could fit. With some wiggling I got it in about a third of the way, and by placing a baton over the end and hitting it with a hammer I got in the second third. After that it was stuck fast. I was fairly sure that the other end of the pipe was probably snagged on a bit of brick, but I didn’t have a ladder to check. This wasn’t quite the oversight it sounds like – I did know I needed a ladder to fit the external vent, but I was trying to get things ready a few days before I collected the ladder.
Anyway, by the time I got the ladder and had some time to do it, it was the day before we went on holiday, and I couldn’t really leave the house with a big hole in the kitchen for a week. I knocked out some chunks of brick to make the hole, if not bigger, at least with a few ridges in it. This convinced me I’d done the right thing in getting the hole cut: exterior bricks are hard! I started using a chisel and lump hammer but found the chisel too big. In the end I used an old flat-headed screwdriver.
10 mins of chipping away loosening the edges of the pipe gained about 2cm in banging from the kitchen side. After 4 or 5 trips between the kitchen side and the exterior side I was starting to dent the plastic pipe with the banging but the pipe was almost entirely in. I eventually called it a day with about half a centimetre to spare sticking out the kitchen side – I was starting to hit the wall with the baton and anyway, with a decorative hood on, no-one would see it.

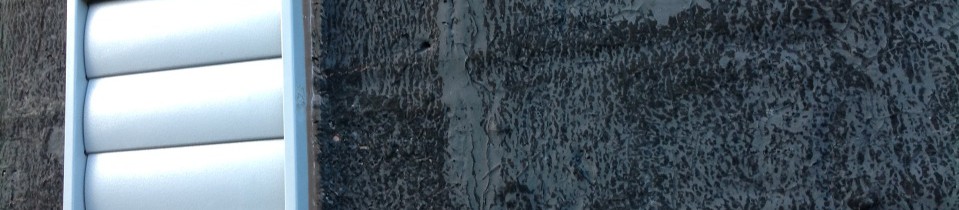
Not the finest piece of work I’ve done… but you won’t see it once the cooker hood is on
This plastic conduit probably wasn’t strictly necessary but it did help make the hole a little smaller. If I was doing this again I’d find out was drill bits my plumber had first, then try and go for one which was just a bit over 100mm. Done properly, the hole was actually really smooth – much smoother than I was expecting.
Fitting the exterior vent was simplicity – it’s just 4 screws you need to drill wall plugs for – both the screws and plugs are included in the kit. Just make sure you use the jubilee clip to attach the hose to the exterior vent before you screw it to the wall! I then applied some brown exterior sealant around the edges to form a watertight seal.

This part I’m quite proud of…
How the top of your cooker looks will determine what happens next. Mine was just a hole – no fittings or anything. Also, the hole was about 110mm – perfectly too big for the 100mm pipe I was using but technically too small for the 120mm pipe.
I’m sure there’s probably proper kits you can buy to make this bit easier, but I’d already bought two extractor kits and didn’t really want to spend any more money on this. I found that the 120mm pipe could be convinced to fit into the cooker outlet with some gentle persuasion and a little folding in of the metal. I cut a 20cm length of the 120mm pipe which I fitted into the cooker, then positioned the 100mm pipe (the one I’m actually using) inside it. I then used the second jubilee clip (each kit came with one!) to clamp the larger pipe around the smaller one until it made a (almost) air-tight seal.
It’s probably not the right way, and I’m sure it probably leaks a little bit of air. But it 99% works, and when it comes to kitchen fan extractors, that’s good enough for me. It’s 99 times better than what we had before and once we get a decorative hood to hide it, it’ll be forgotten forever.
This probably hasn’t been the most informative post, but hopefully if you’re about to do something similar you can learn from me and avoid some of the pitfalls I fell into!
Written by Tom Morgan
 Tom is a Microsoft Teams Platform developer and Microsoft MVP who has been blogging for over a decade. Find out more.
Actually more useful than you’d think. 😉