


UCWA Sample Project – Online Chat Example
Microsoft is working to make Lync as extensible and accessible to developers as possible, and it’s my mission on this blog to help you write amazing solutions which use Lync. UCWA is Microsoft’s latest API and allows you to connect to Lync anywhere the client isn’t available using HTTP calls.
In this blog post I want to showcase what’s possible by showing you how to build a simple online chat that will allow people on a website (without Lync) to chat to a Microsoft Lync user in their browser. There is also a GitHub project, where all this code is available for you to use and improve on.
Video Demo
Here’s what the sample project does:
What this is (and what is isn’t)
So, a couple of disclaimers… 😉 What I’m describing in this post is a web site which, when the page loads, will sign in as a specific user. The page will monitor the presence of another Lync user, and use this user’s presence to mark the online-chat function as being ‘online’ or ‘offline’. The page will also start a new conversation with that user.
Whilst this is a good demo of what UCWA can do, there are some problems here which prevent this being a workable solution for all but the smallest of projects. The credentials are in the JavaScript, so they can be seen by anyone. Everyone signs in as the same user, so it won’t scale. You can only contact a single person.
There are definitely ways around these problems … but this isn’t the post for them. I just wanted you to be aware of them so you don’t read this post and think this is the best, or only, way of using UCWA.
Helping Hand
I’m going to be using the UCWA helper libraries to make development easier. These are JavaScript files which provide you with useful functionality such as Auto-Discovery, Caching, Eventing etc. You can download the helper libraries for use in your project here.
I’m also using a free Bootstrap template as I needed a sample company site to add the UCWA code to.
The template has a number of static pages, I’m going to be changing the Contact page, which currently looks like this:
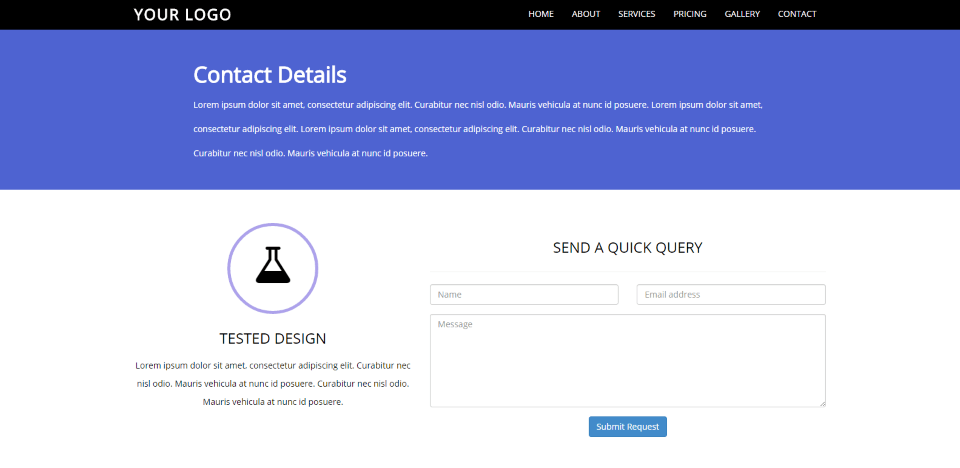
I’m going to get rid of the form on the right, and instead replace it with something else.
Getting Logged In
The first thing to sort out is getting logged in. To start, I’m going to create a new JavaScript file, lyncLoginAndSubscription.js.
There are a few things when logging in which the helper files make a lot easier than they might otherwise be. Two are these are Autodiscovery and cross-domain calls. Autodiscovery is the process of taking your SIP address (for instance sip:[email protected]) and working out what the URL of the server which will be processing the UCWA commands will be and what the root UCWA URL is (for instance https://lyncweb.thoughtstuff.co.uk/Autodiscover/AutodiscoverService.svc/root/user). It does this by trying various different combinations of protocols and URLs until it finds one that works. Cross-domain calls (your domain making AJAX calls to the Lync domain) would normally be prevented by modern browsers as they are deemed a security risk. However, the cross-domain helper code handles these and places them in a cross-domain iframe, thus securely bypassing this issue. This is why you pass a div reference to the startDiscovery function: it’s the location of a div which you should hide, where the iframe will be hosted.
Logging in, then, is a case of first discovering the UCWA root URL, and then passing sign-in credentials:
function SignIntoLync() {
site.ucwa.Transport.setRequestCallbacks({
start : ajaxStart,
stop : ajaxStop
});
ajaxStart();
site.ucwa.AutoDiscovery.startDiscovery(loginDomain, $("#container"), handleAutoDiscovery);
}

function handleAutoDiscovery(link) {
ajaxStop();

if (link) {
site.ucwa.Authentication.setCredentials(loginSIPAddress, loginPassword);
site.ucwa.Authentication.start(link, site.ucwa.createApplication(), handleLogin);
} else {
alert("Autodiscovery failed!");
}
}

function handleLogin(isAuthenticated) {
ajaxStop();

if (isAuthenticated) {
console.log('logged in');
SubscribePresenceUpdates();
} else {
alert("Login failed");
}
}
You’ll notice that site.ucwa.Transport (the Transport helper class) allows you to specify two functions which are called when AJAX calls start and stop. This is so you can provide some feedback to the user that something is happening. I’m using it to show and hide a loading gif. These functions are hidden in lyncchat.js – which I’m using as a general helper file for this project.
Subscribing to Presence
In this sample application, the first thing I want to do once I’m signed in is subscribe to a specific user’s presence. If they’re Available, then I’m going to display that my chat application is Online, otherwise it’s Offline.
To subscribe for event changes, you add event handlers to the site.ucwa.Events object, which is the Events helper class. In this case I’m adding two handlers (both going to the same function) for contactPresence. After that, it’s just a case of specifying which SIP addresses you want to be notified about and then making a call via the Transport helper (via the Cache helper, which keeps a copy of the root URL):
function SubscribePresenceUpdates() {
var raiser = {
rel : 'contactPresence'
},
handlers = {
started : handleGetPresence,
updated : handleGetPresence
};

site.ucwa.Events.addEventHandlers(raiser, handlers);
site.ucwa.Events.startEvents();

var sips = [subscribeToSIPAddress];

var data = {
"duration" : 11,
"uris" : sips
};

site.ucwa.Cache.read({
id : "main"
}).done(function (cacheData) {
site.ucwa.Transport.clientRequest({
url : cacheData._embedded.people._links.presenceSubscriptions.href,
type : "post",
data : data,
callback : function (data) {
window.site.adHocSubscriptionLink = data.results._links.self.href;
}
});
});
}

function handleGetPresence(data) {
if (data.results !== undefined) {
if (data.results.availability == 'Online') {
$('#chat-offline').hide();
$('#chat-online').show();
} else {
$('#chat-offline').show();
$('#chat-online').hide();
}
} else if (data.link) {
site.ucwa.Transport.clientRequest({
url : data.link.href,
type : "get",
callback : handleGetPresence
});
}
}
As you can see, based on the Availability I’m showing one of two divs, depending on whether chat is Online, or Offline.
The Offline div is that one I show by default, so it’s also shown whilst logging in (which the loading gif mentioned earlier to show that something is happening):
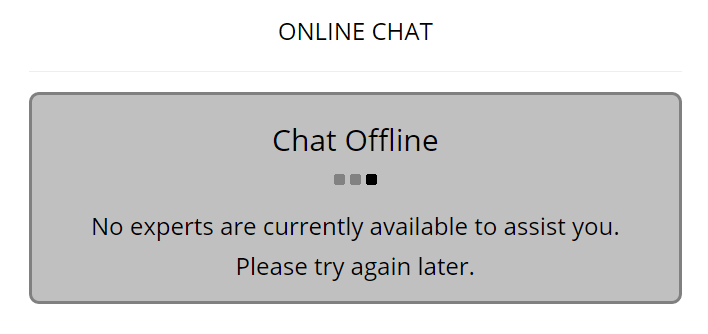
Only if the remote person’s presence is Available do I change to show the other div. I’ve also added some HTML controls for sending messages:

Sending a Message
I’ve created a separate JavaScript file to cover the sending and receiving of IMs: IMConv.js.
As well as the HTML controls for sending messages, in CSS I also define two inner divs, for each side of the conversation so that they will display differently:
When someone enters a message and clicks Send, one of two things should happen. Either, this is the first message being sent – in which case a new conversation should be started. Or, there is already a conversation in process, in which case we’re just adding another message to the existing conversation. I’m handling this in the on-click function by evaluating a conversation object (which is populated once a conversation is established). I’m also checking to see if the OperationResource helper library has been initialised, and if is hasn’t then I do that, along with setting some conversation defaults, such as subject, importance etc.:
$("#chat-send").click(function () {
if (typeof opRes == 'undefined') {
Initialise();
}

if (typeof conversation == 'undefined') {
StartNewConversation();
} else {
SendMessage();
}
});
Starting a new conversation
To start a new conversation, two things need to happen. The startMessaging URL needs to be called (to tell UCWA that we want to start a new conversation), passing in a payload representing the new conversation, and we need to subscribe to enough events that we can monitor the conversation once it’s started. The important events to register for are changes to the state of the conversation, changes to the state of the messaging modality within the conversation, and notifications about new messages. These are the ‘conversation’, ‘messaging’ and ‘message’ events respectively, which we add event handlers for in the code below:
function StartNewConversation() {
site.ucwa.Cache.read({
id : "main"
}).done(function (cacheData) {

imData.sessionContext = site.ucwa.GeneralHelper.generateUUID();
imData.operationId = site.ucwa.GeneralHelper.generateUUID();
imData.to = destinationSIPAddress;
site.ucwa.Transport.clientRequest({
url : cacheData._embedded.communication._links.startMessaging.href,
type : "post",
data : imData,
callback : function (data) {
if (data.status === 201) {
if (handlers.indexOf("conversation") === -1) {
handlers.push("conversation");
site.ucwa.Events.addEventHandlers({
rel : "conversation"
}, {
updated : handleConversation
});
}

if (handlers.indexOf("message") === -1) {
handlers.push("message");
site.ucwa.Events.addEventHandlers({
rel : 'message'
}, {
completed : handleMessage
});
}

if (handlers.indexOf("messaging") === -1) {
handlers.push("messaging");
site.ucwa.Events.addEventHandlers({
rel : "messaging"
}, {
updated : handleMessaging
});
}

site.ucwa.Events.startEvents();
} else {
cleanupMessaging();
}
}
});
});
}
The only conversation state change I’m interested in is when the conversation moves to ‘Disconnected’, so I can do some cleanup. Likewise, the only messaging state I’m checking for is ‘Connected’. This one is important because in the message data for this state are two URLs – used to send a message, and stop messaging. This is also the confirmation we need that the conversation is fully set up, and we can proceed to send our first message:
function handleMessaging(data) {
if (data._embedded.messaging.state === "Connected") {
conversation = data;
messagingLinks.SendMessage = data._embedded.messaging._links.sendMessage.href;
messagingLinks.StopMessaging = data._embedded.messaging._links.stopMessaging.href;
SendMessage();
}
}
The ‘handleMessage’ event fires for incoming messages. After some checks to make sure that the data is what we expect, we can add it to our conversation div. Notice I’m using a specific div format for incoming conversations, so that I can display them differently to outgoing ones:
function handleMessage(data, parts) {
if (data._embedded && data.link && data.link.rel) {
var embedded = data._embedded[data.link.rel] || false;

if (embedded && embedded._links && embedded._links.plainMessage && embedded._links.plainMessage.href) {
var message = decodeMessage(embedded._links.plainMessage.href);

var newItem = "<div class='conversation-recd'><span class='conversation-recd-text'>" + message + "</span></div>";
AppendToConversation(newItem);
}
}

}
Sending a message
If the conversation is already set up (so, for the second, third messages etc) control drops straight through to the SendMessage() function. For a new conversation, SendMessage is called once the conversation is set up. Sending a message is one of the easiest parts of the solution: it’s a HTTP post to the SendMessage URL we picked up earlier, with the text we want to add to the conversation.
Outgoing conversations are added to the conversation div once they’ve successfully been sent, as part of SendMessage(). The only thing to watch for when sending messages is that you need to provide a unique OperationContext as a parameter when posting to the SendMessage URL, so that UCWA knows it’s a new message:
function SendMessage() {
var textToSend = $('#chat-input').val();

if (textToSend !== "") {
site.ucwa.Transport.clientRequest({
url : messagingLinks.SendMessage + "?OperationContext=" + site.ucwa.GeneralHelper.generateUUID(),
type : "post",
data : textToSend,
contentType : "text/plain",
callback : function (data) {
$('#chat-input').val('');
var newItem = "<div class='conversation-sent'><span class='conversation-sent-text'>" + textToSend + "</span></div>";
AppendToConversation(newItem);
}
});
}
}
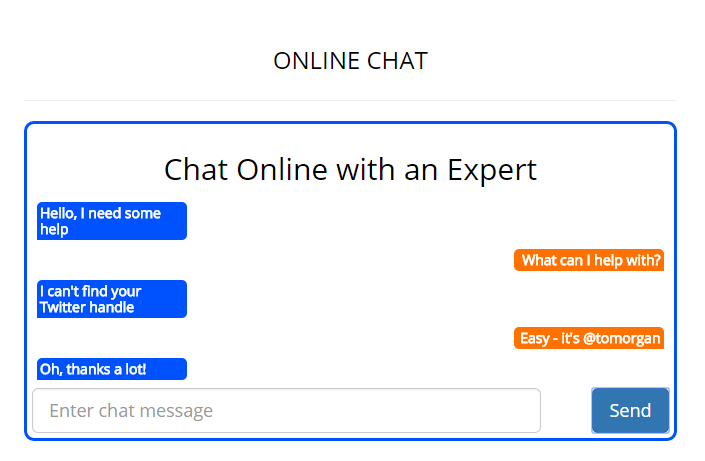
Once that’s in place, sending a message from the webpage will initiate the process of starting a new conversation, and from that point, messages can be sent both ways:
As I said earlier, this sample solution has some issues which prevent it being used in production – but it’s simple enough to be able to cover in a single blog post – and hopefully it’s shown you what’s possible today with UCWA.
We now know that the next version of Microsoft Lync – Skype for Business – will contain an updated version of UCWA, which will add audio, video and sharing capabilities. This will make it even more useful and expand the opportunities for using it.
All the code for this project is on GitHub, so feel free to get this working inside your company, or improve it and use it for your own projects.
Written by Tom Morgan
 Tom is a Microsoft Teams Platform developer and Microsoft MVP who has been blogging for over a decade. Find out more.


Hi, do you by any chance know how to have multiple conversations with one end recipient but from multiple web visitors. So a site would have for example 10 visitors each wanting to have a unique chat with the recipient. At the moment one conversation ends and the new one takes over in the same window.
I’m trying to use your free code and receive Autodiscovery failed! error. I used my credentials and it still does not work. Please, help me.
Have you stepped through all the pre-requisites listed here: UCWA Prerequisites: Before You Start
It sounds like you don’t have an Edge server listening on your domain that’s capable of processing UCWA requests, or you’re accessing it from a domain which isn’t in the allowed list. That blog post can help with both those things.
-tom
I am working with the REST API of Skype Web SDK using Java , i am able to work with the command channel and send the message .
I event want to monitor the incoming messages so that i can parse them and issue a command
(working on a Internet of Things UseCase) to the devices . Can you please help me out in working with the event channel using REST API so that i can monitor the incoming conversations
I a getting Service does not allow a cross domain request from this origin error.How to fix it?
Hi, I would like to use this chat optiona lone from my servicenow tool. Need the HTML code and advice how to use this. Please do the needful.
GET http://localhost:8080/ucwamaster/content-template.html 404 (Not Found)
I am getting this error, and file content-template.html is not there in the project!
Awesome post, thanks for the github links, I had a problem with autodiscovery (solved ). Too many different domains to add the cross domain list.
I like the simplicity of this , the microsoft UCWA samples are flaky for onpremise Skype.
— Martin
Hello
How would you recommend to pass the credentials in a secure way and not in the javascript ?