


UCMA Workflow 2 – Common Shapes
This is post number 2 in a series of 4 on using UCMA Workflow. If you need more information on this or are looking for a reference guide, I highly recommend Professional Unified Communications by George Durzi & Michael Greenlee, which has an entire chapter (50 pages) devoted to Workflow.
In the last post I introduced UCMA Workflow, the sort of applications it lends itself to, and how to prepare a UCMA application to run a workflow. In this post I’d like to look at some of the different workflow shapes which are available for you to use with UCMA – the Unified Communications Workflow objects. You can find all these shapes in the Toolbox when you have a Workflow file (.xoml) open. I’ve concentrated on highlighting just the shapes that you’d need to create a simple IVR solution, so you won’t find all the available shapes listed here. For instance, there’s a bunch of commands to do with Instant Messaging which I’ve completely ignored for now.
Accept Call
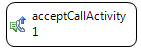
![]() In an incoming call workflow, this is usually the first shape you’ll need to add. As the name suggests, it picks up the call, connecting the caller with your application. There are no options which you can set. There is no “Decline Call” shape, so if there are certain calls you’d rather not have the workflow deal with, handle these in your UCMA application before starting the workflow.
In an incoming call workflow, this is usually the first shape you’ll need to add. As the name suggests, it picks up the call, connecting the caller with your application. There are no options which you can set. There is no “Decline Call” shape, so if there are certain calls you’d rather not have the workflow deal with, handle these in your UCMA application before starting the workflow.
CommunicationSequence
 This container shape groups together a set of sequential activities which take place on a Call. The shape also allows you to attach event shapes to it, such as CallDisconnectedEvent, which will then be processed if the call is disconnected anywhere within the sequence.
Important: you need to house some of the other UCMA shapes, such as SpeechStatement, within a CommunicationSequence container, otherwise they won’t work. (I can’t remember who’s blog I picked up this invaluable bit of information, but thank you! I left a comment, so if it was you let me know!)
SpeechStatement
 This shape provides a means for you to read aloud to your caller. You can specify a text string in the MainPrompt property and UCMA will convert this to audio for you using text-to-speech (TTS).
You can also build up text programmatically and have this read aloud. To do this, attach to the TurnStarting event of the shape. This fires just before the speech is read – giving you an opportunity to change the value of MainPrompt. For instance, to greet the user with the current time:
speechWelcomeMessage.MainPrompt.AppendText("Hello. The time is ");
speechWelcomeMessage.MainPrompt.AppendTextWithHint( DateTime.Now.ToLongTimeString(), Microsoft.Speech.Synthesis.SayAs.Time);
Notice on the second line how I’m using AppendTextWithHint – telling UCMA that what it’s about to read is a time. This means it sounds much more natural. There are lots of different SayAs hints, such as Currency, Date, Telephone and SpellOut. I’ve found SpellOut useful for reading out the protocol and domain codes of URLs.
Additionally, if you have a larger amount of text to read out, you can tell UCMA where the sentences and paragraphs lie using StartSentence, EndSentence, StartParagraph, EndParagraph.
Watch out though: under the hood this is converted to VoiceXML. Therefore, if you call StartParagraph, be sure to call EndParagraph later on, otherwise you’ll get XML syntax errors.
SpeechQuestionAnswer
 This shape provides all the same functionality as the SpeechStatement, but (as the name suggests) will also collect feedback from the caller. It’s designed for when you want to provide the caller with a set of options, and collect the chosen choice.
As with the SpeechStatement there is a MainPrompt property, which you can modify in code for more flexibility. However, there are also other prompts which cover situations such as the response not being recognised, the caller not saying anything etc.
You have to give the shape some hints about what you’re expecting the user to say. For instance, let’s say that your MainPrompt is this: “Press 1 for Sales, 2 for Finance, or 0 to speak to Reception”. What you’re expecting here are one of 3 DTMF tones. To tell the shape these values, click the ellipses next to the ExpectedDtmfInputs value window and add the values:

On the other hand, maybe you want to impress your boss wow your customers with a smoother experience by getting them to say what they want. In this case our MainPrompt might be: “Are you calling about an existing ticket?”, and our expected values now are “Yes” and “No”. To tell the shapes these values, click the ellipses next to the ExpectedSpeechInputs value windows and add the values:

You can have both expected DTMF and Speech inputs – in fact I recommend you do. The speech recognition is good, but we humans are the weak link, with our crazy dialects and regional varieties. By allowing users to enter either speech or DTMF tones you can prompt for speech in the MainPrompt as above, but then provide a different message in the NoRecognitionPrompt, such as “Sorry I didn’t understand you. Press 1 for Yes and 2 for No”. You just have to remember that now you have 4 possible inputs, not just 2. (I’ll cover reading these inputs back in session 3)
IfElse
 This isn’t actually a Unified Communications Workflow shape, it’s part of Windows Workflow v3.0. However, it’s so useful in an IVR solution I had to mention it. It’s this shape which will make the decisions once you have asked your caller a question and want to parse the answer. You can add multiple branches to the shape to represent different paths, with each one having a true/false condition to evaluate, and the first branch which evaluates to true will be used. You can also choose to leave up to one branch without a condition – this is your Else statement.
You specify the condition for each branch in the Condition property of the branch. You can choose to evaluate a Code Condition or a Declarative Code Condition. A Declarative Code Condition allows you to create and manage rules within the Workflow object:

The other option, a Code Condition, allows you to choose a method from your supporting code-behind to use in the evaluation. In order to use this you must have a method with the following signature which sets the value of e.Result to either True or False:
private void DayIsSunday(object sender, ConditionalEventArgs e)
{
If (DateTime.Today.DayOfWeek == DayOfWeek.Sunday)
{
e.Result = True;
}
else
{
e.Result = False;
}
}
Once you have this you’ll notice that the method name shows up in the Condition property box.
Blind Transfer
![]() As the name suggests, this shape will force a transfer to a number of your choice. This is OK if you’re transferring to a line which you know will connect, such as a Sales Hunt Group number. However, if the called party doesn’t pick up then the call terminates immediately. Also, if the incoming call is from Lync then the transfer is obvious – the Lync call window shuts down and then re-opens with the new number. There is a nicer way of doing this – the Attended Transfer, which
As the name suggests, this shape will force a transfer to a number of your choice. This is OK if you’re transferring to a line which you know will connect, such as a Sales Hunt Group number. However, if the called party doesn’t pick up then the call terminates immediately. Also, if the incoming call is from Lync then the transfer is obvious – the Lync call window shuts down and then re-opens with the new number. There is a nicer way of doing this – the Attended Transfer, which I’ll talk about in another post I talk about here.
With just these 6 shapes you can build quite a decent simple IVR system to transfer users from a central number to different destinations based on their response. Obviously you can use these building blocks for lots of other applications, you can involve database lookup functionality to drive decision making, construct complicated workflow paths from this and generally guide users through a workflow, being driven by their feedback.
In the next post I will walk through creating just such an IVR solution.
Written by Tom Morgan
 Tom is a Microsoft Teams Platform developer and Microsoft MVP who has been blogging for over a decade. Find out more.

Hi,
If I change any property of any workflow component I get the following error. If I just drop a component and run debug no problem. I am using VS 2010, can this be the problem?
Thanks
Error 1 Could not create activity of type ‘CommunicationWorkflow1.Workflow1’. System.InvalidCastException: [A]Microsoft.Speech.Synthesis.PromptBuilder cannot be cast to [B]Microsoft.Speech.Synthesis.PromptBuilder. Type A originates from ‘Microsoft.Speech, Version=11.0.0.0, Culture=neutral, PublicKeyToken=31bf3856ad364e35’ in the context ‘LoadFrom’ at location ‘C:\Program Files\Microsoft SDKs\Speech\v11.0\Assembly\Microsoft.Speech.dll’. Type B originates from ‘Microsoft.Speech, Version=10.2.0.0, Culture=neutral, PublicKeyToken=31bf3856ad364e35’ in the context ‘Default’ at location ‘C:\Windows\assembly\GAC_MSIL\Microsoft.Speech\10.2.0.0__31bf3856ad364e35\Microsoft.Speech.dll’.
at Microsoft.Rtc.Workflow.Activities.SpeechStatementActivity.get_MainPrompt()
at CommunicationWorkflow1.Workflow1.InitializeComponent()
at CommunicationWorkflow1.Workflow1..ctor() c:\users\erolyildiz\documents\visual studio 2010\Projects\CommunicationWorkflow1\CommunicationWorkflow1 1 1