


Presentation Translator – Tips & Tricks
A couple of weeks ago I blogged about an amazing new PowerPoint add-in called Presentation Translator which performs speech recognition in real-time and enhances your presentation with subtitles in either your spoken language or automatically translated.
Earlier this week I chatted with Katharine from the Presentation Translator team at Microsoft about the add-in. As is often the case with things like this there were a number of things I hadn’t picked up on, so I wanted to put that right with this blog post. There are also some interesting use cases and applications we talked about.
Best Practices for use
Microsoft are using the Presentation Translator themselves every day (see dogfooding) to give presentations in many different scenarios. These are some of the best practices they have collated from hours of use:
- The Presentation Translator will automatically insert a slide into your presentation, which looks like this:
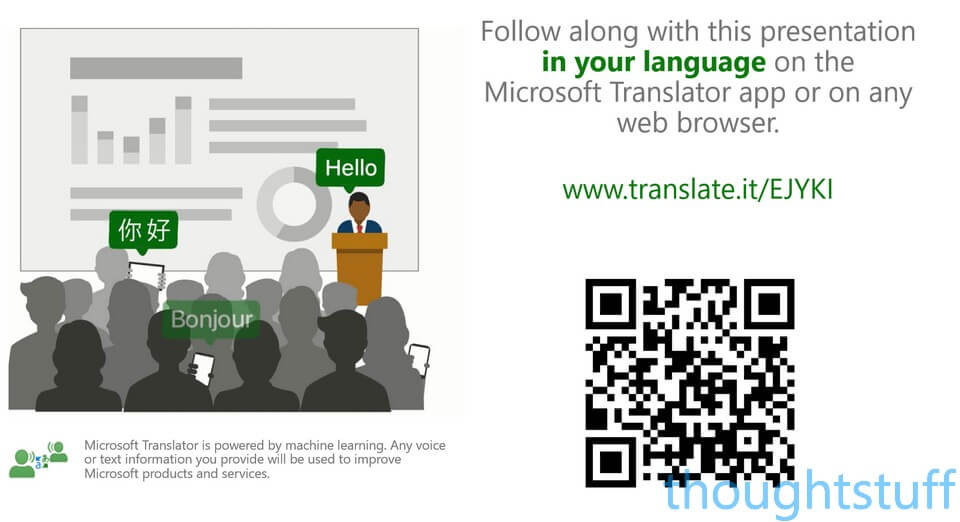
Make this slide the one that people see when they’re coming into the room and settling themselves down. I know you want to show the one with your name, session title and Twitter handle but don’t worry there will plenty of time for those later and at the end! People need time to set up their devices, maybe download the app and configure it. Don’t rush through this slide in 10 seconds without giving them a chance. Also, be clear about your instructions to them. Don’t ignore this slide, embrace it! You’re using amazing technology, share it! Point out the URL, point out the QR code, tell them about the Microsoft Translator app they can use to follow along. - Once you are showing this slide and before your presentation starts, mute your mic. Otherwise, everyone will see your mutterings about the equipment setup displayed on the screen! A handy mute/unmute keyboard shortcut is CTRL + ALT + F4.
- Play with the placement options for the translator bar. I personally find it looks best docked to the bottom of the screen (not the top, as is the default). There are a few reasons for this: firstly, when it’s at the top it tends to obscure the title whereas the bottom is often empty space. Secondly, it ‘feels’ more natural, echoing the established norm for displayed subtitles on TV and film at the bottom.
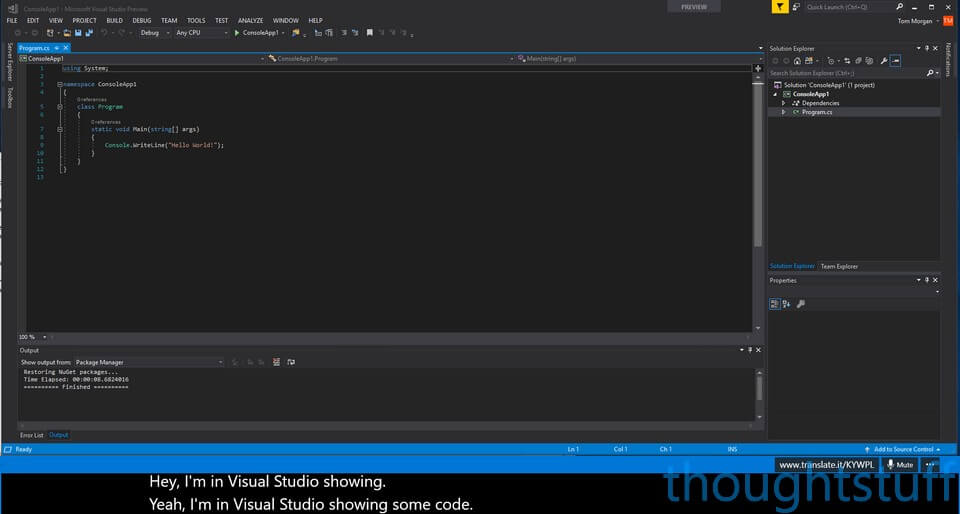
- You can actually drop out of the presentation and show other things on your machine, and still keep the translation and subtitling going. This is good for developer-focused talks where I often want to show content in Visual Studio or demo a feature. Once you’ve stopped Powerpoint’s Presentation Mode, you’ll notice that there is a separate window for the subtitles, which you can move around the screen. For instance, here I’m in Visual Studio showing some code, but with subtitles below the screen. (As a suggestion, it would be great if there was an option to Always On Top the subtitles so I don’t have to resize the Visual Studio window):
- For technical content presentations (such as developer-focused ones) make sure to select ‘Personalize Speech Recognition’ in the setup options:
 Do this before your presentation because it can take 3-5 minutes to train. What it does is take all the technical words and jargon from your slides and speaker notes and uses it to inform the speech recognition engine. Once you’ve trained it then it’ll stay trained for up to 30 days, or until you change your slide content. If you know you’re going to be using specific vocabulary in your presentation which isn’t in your slides then you can put them into a hidden slide, or use the Speaker Notes to capture them. This process of using specific given words and phrases to improve translation is done using Custom Speech Service (CSS), a Microsoft Cognitive service, and is currently available when the spoken language is English or Chinese.
Translate the Deck!
This is a massive thing I missed the first time around. You can translate your entire deck into another language! Just click ‘Translate Slides’ and choose the origin and destination languages:
![]()
When you click ‘Translate Slides’ you’re prompted to save your deck to another file, with the suggested name being a helpful concatenation of your original file name and language code.
The translated slides actually look really awesome. A lot of effort has gone into making sure that the style and layout are maintained. That’s not always going to be possible because some languages use more letters to say the same thing, but it’s absolutely good enough to use without needing to go through and tidy it up first.
Other Tips
- At the end of the presentation, you can save the transcript. Click on the URL in the Translator Bar and choose Save Transcript. The transcript is saved as a .txt file and is then ideal for publishing alongside any recordings, blog posts etc.
- Up to 500 people can join the hosted room and view the subtitles in their chosen language. This makes it ideal for breakout rooms or overflow sessions.
- Encourage people to use the Translator App to submit Q&A in their chosen language. The Translator App can be a 2-way experience, it’s not just for displaying what you’re saying.
- Just like you would for any audio recording, carefully consider audio input and microphone placement to give the Translation Service the best chance of success. If you’re presenting in a room with an existing PA system it’s best to take that feed and jack it directly into your laptop or another machine specifically for running Presentation Translator. Otherwise, consider wearing a wireless headset. Some of the smaller BlueTooth headsets make excellent USB microphones and are discrete enough to wear whilst presenting.
Useful Information
- There are currently 10 languages supported for speech recognition: Arabic, Chinese, English, French, German, Italian, Japanese, Portuguese, Russian and Spanish. There are many more supported languages for text translation though (more than 60). Remember though that only English and Chinese can be used with Customised Speech Services (personalized speech recognition).
- The Translator App has mobile clients on iOS and Android and an app for Windows 10. You can also use the web experience which is also supported in all those places, and on OS10.
- There is currently no cost to use this service as it is in preview. (so make the most of it!)
- For more information about Presentation Translator and the other things being worked on in this area, check out the Microsoft Translator blog at aka.ms/translatorblog.
- If you run into any problems, check out the Microsoft Translator UserVoice forum: https://microsofttranslator.uservoice.com/forums/601462-translator-live-feature-presentation-translator-a
Written by Tom Morgan
 Tom is a Microsoft Teams Platform developer and Microsoft MVP who has been blogging for over a decade. Find out more.


The best practice to involve all kind of audience in a presentation is to entertain them in their native language. The tips mentioned here are very useful. Thanks for sharing them.