


Building a Out of Office reminder with the new Skype for Business Connector for Microsoft Flow
The Skype for Business Connector is now available for Microsoft Flow, PowerApps and Logic Apps. Connectors are wrappers around API functionality that make it really easy to join together, plugging together different “building blocks” in a visual interface. No coding experience is needed and you can build complex interactions easily and solve real-world problems.
Right now, there are two “actions” (or “things you can do”) with the new Skype for Business Connector: you can send an IM, or you can create a new meeting. In this blog post I’m going to concentrate on the first one and build something in Microsoft Flow.
I’m going to build a Flow that automatically IMs my line manager on every morning that I’m Out of Office. This can serve as a useful reminder that I’m not around and not to email me anything that’s urgent. It’s more proactive than having to wait for an OOO email to come back.
There’s a couple of parts to this. Firstly, I need something that can run on a schedule, say 9am every morning. Then, I need to be able to look at my Office 365 Automatic Reply status. If it’s on, then I need to work out who my direct manager is, then finally use the Skype for Business Connector to send them a message. Bonus points for including the Automatic Reply message as it will have useful information about when I’m back at work.
Here’s what that looks like in Flow:
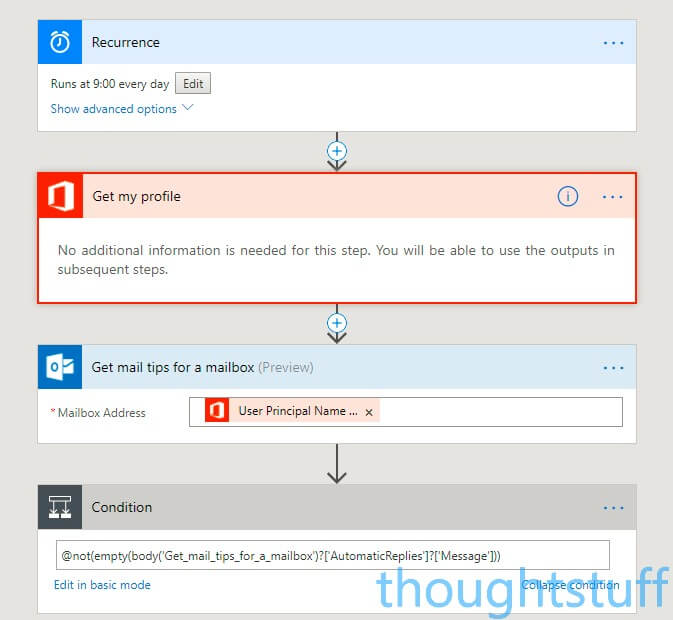
I’m using the “Recurrence” action to schedule when this Flow runs. Then, I’m getting my profile. Yes, I could hardcode my name and my boss’s name, but this way if any information changes then it’ll always be up to date. Also, it means I can share it with you and it’ll “just work” for you too.
I’m using a “Get Mail Tips for a Mailbox” action because it brings back some really useful information about a mailbox, such as whether it’s full or not, what the maximum message size is, and whether Automatic Replies are enabled or not. If they are, then the Out of Office message will be in the Message field. This also gives us a good condition to test for – after all, we only want to send out an IM if we actually are out of the office and have Automatic Replies turned on.
To do that, I’m using this condition: @not(empty(body(‘Get_mail_tips_for_a_mailbox’)?[‘AutomaticReplies’]?[‘Message’])). You can also build up conditions in Basic Mode, but sometimes they don’t offer exactly the granularity you’re looking for, such as in this example.
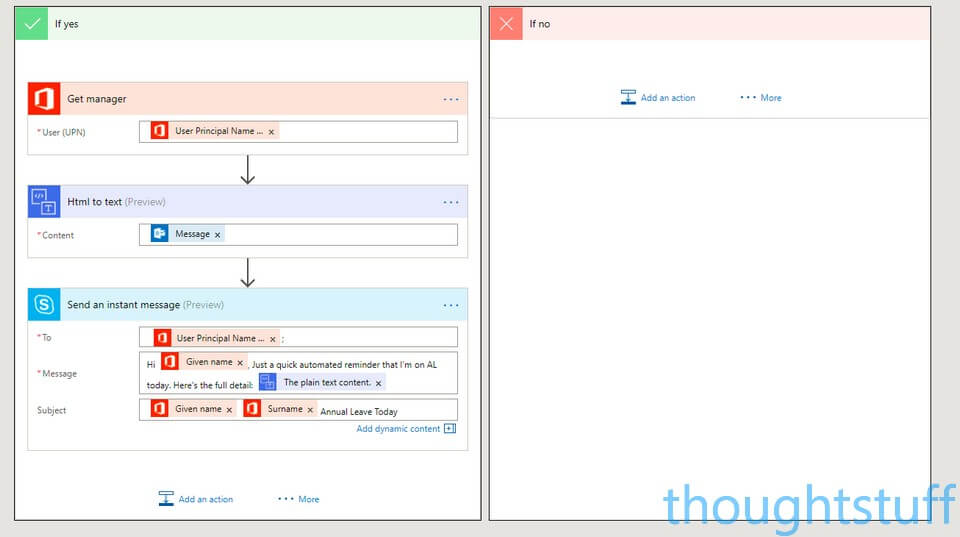
This is the second part of the Flow, and is only triggered if the Condition about Automatic Replies is a “Yes”. Firstly, we use the Office 365 “Get Manager” action to pull the AD object for my line manager as stored in AD.
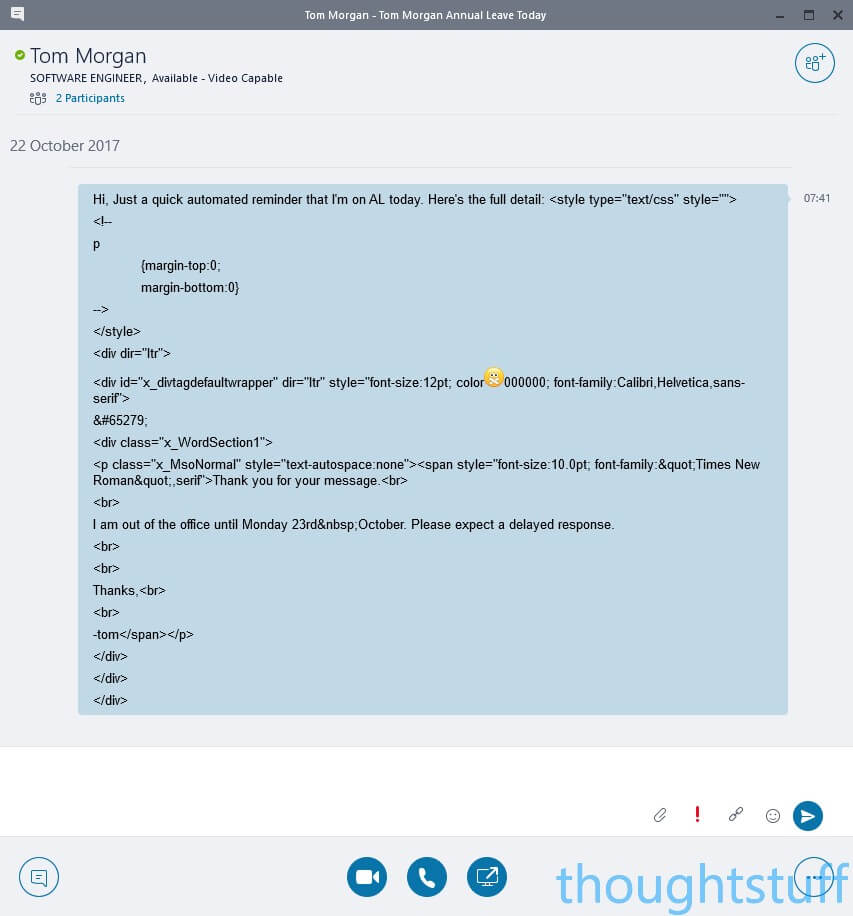
Before we send the IM, I wanted to do something with the Automatic Reply. By default, it’s stored as HTML, so it’s got loads of tags and formatting in it. If I dropped that into an IM then I think it would look terrible:
I had a look around and found a handy “Html to text” action which I can give the Automatic Reply to and which will strip out all the HTML formatting, leaving me with just the text.
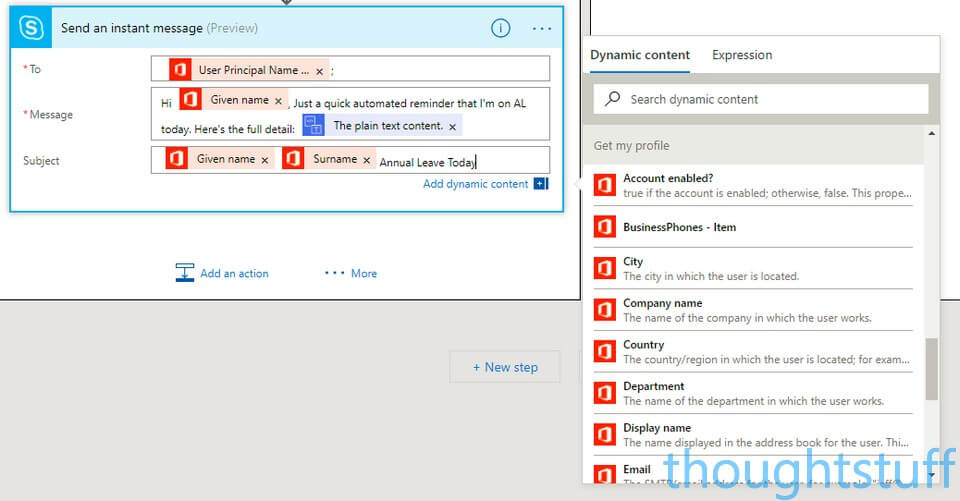
Finally, I’m ready to send my instant message. I dropped in the Skype for Business Connector. I didn’t have to provide any credentials: it uses my Office 365 account. I can then populate where my message is going, what the Subject is (the text shown on the popup toast when a new IM arrives) and what the actual message is. I’m pulling the User Principal Name and Given Name of my line manager to make sure it goes to the right person and personalise it a bit, and then my Given Name and Surname in the Subject.
If you haven’t used Flow before, it’s definately worth trying it out. You can build up different actions like the ones above quickly and easily. As you bring in data from running actions, variables from those actions are then available to you later on to use. For instance, once I added the Get My Profile action at the top of the flow, I can then bring in data in any later Flows, simply by looking through the list and choosing what I want:
Here’s the final output (but sent to me, not my manager. Nobody likes spam IMs, even just for testing purposes!):
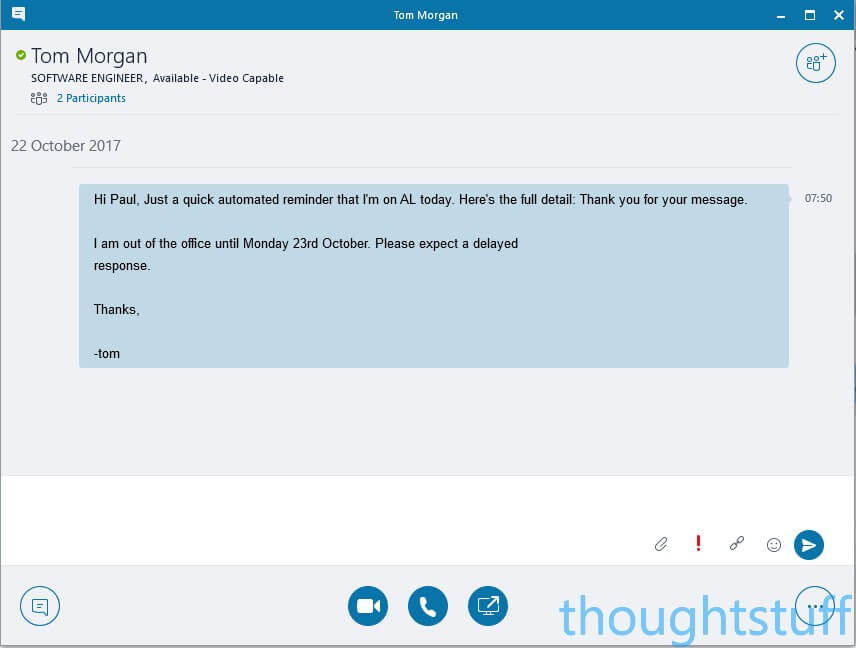
In my testing, I found that sending the IM was almost instant, no appreciable delay at all.
Written by Tom Morgan
 Tom is a Microsoft Teams Platform developer and Microsoft MVP who has been blogging for over a decade. Find out more.
Related posts:
 Microsoft announces Skype for Business App SDK for mobile applications
 Building a Speech Transcription and Translation Bot in Skype for Business using UCMA and Microsoft Translator API
 The future of Skype for Business Development in Office 365
 Skype for Business Technical Training at Office 365 Summit
 New Channel9 video: Microsoft Bot Framework Skype for Business Integration – Outbound Messaging to Skype for Business Clients