


Learn Azure Communication Services Day 5 – Making a peer-to-peer VoIP WebRTC call
This blog post is part of a series called “Learn ACS“, all about Microsoft Azure Communication Services. The series covers a high-level overview of capabilities and considerations, then dives into the development detail of using ACS in your application. Find the rest of the posts in the series at learnACS.dev.
Update 23rd August 2021: There has been a slight change to how you call the Echo Bot, which changes the code. I’ve left the original code as it is, which is fine for making a call to another ACS user. However, if you want to call the Echo Bot service, edit line 28 from this: “const destinationToCall = { communicationUserId: destinationUserElement.value};” to this “const destinationToCall = { communicationUserId: destinationUserElement.value};”, or to be even more simple: “const destinationToCall = { communicationUserId: ‘8:echo123’};”. The difference is that if you are calling the echo bot, you have to use a key of “id” and not “communicationUserId”.
In this blog post, we’re going to create a very basic web application that makes an outbound call using Azure Communication Services.
A quick note on the sample code: Azure Communication Services uses React components to abstract functionality. However, you’ll see in these samples that although my samples are React apps, I’m not laying them out as true React apps or including any of the other artefacts you would normally associate with a React application.
That’s intentional so that anyone who is not yet familiar with React applications but who does understand JavaScript can understand and copy what’s happening. Remember: this is sample code and when building out your own application you should follow all the usual guidance and best practice: these samples are deliberately minimal in order to showcase the ACS content.
Before we start
We’re going to be creating a new Node.js application; so you’ll need to make sure that you have Node.js installed. I used v12.18.4 when producing these samples.
You might be wondering how we’re going to test this application, especially as we’re not going to write anything to receive an ACS call until tomorrow. Luckily, there is an ACS “Test Call” endpoint that we can call, in order to validate that everything is working OK. You can call this endpoint using the identifier 8:echo123 which we’re going to use in our code.
Creating a new Node application
You may be familiar with these steps already, in which case feel free to modify them to suit your development setup. If you’ve never created a Node application before, just follow through the steps and see what’s happening. We’re going to create a new application, add in the Azure Communication Services modules and install webpack to bundle everything together.
Create an empty folder to work in, and then using your favourite command line (this would be a great time to check out what the latest Preview build of Windows Terminal looks like!) navigate to the empty folder. We’re going to start by creating a minimal package file for our Node application with this command:
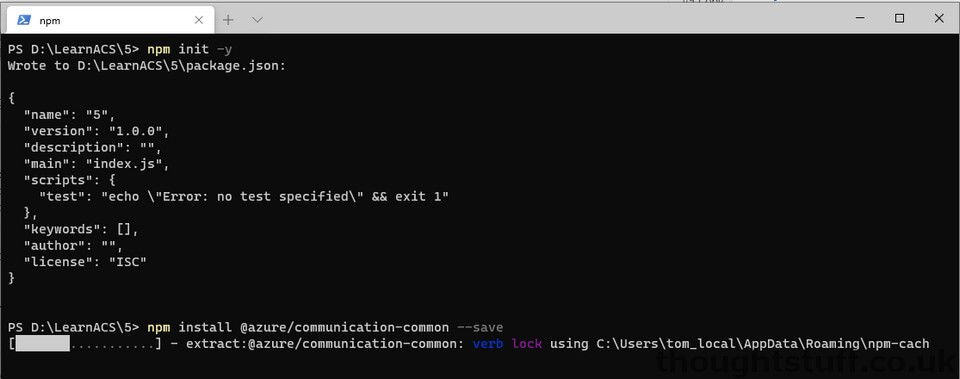
npm init -y
Then, let’s install 2 Azure Communication Services modules: a common one, and a calling one:
npm install @azure/communication-common --save
npm install @azure/communication-calling --save
Finally, we’ll instal webpack, and then we’re ready to add some of our own code. This step can take a little while:
npm install [email protected] [email protected] [email protected] --save-dev
Adding our code
Create two new files in the root of your folder (the same level as package.json, package-lock.json and node_modules), one called index.html and the other called client.js. I’m going to give you all the code in order to get everything working first, then we can go through what it’s doing.
Add this to your index.html file:
Add this to your client.js file. On Line 18, replace the placeholder text with the full URL of your Azure Function created in Day 3, including the code parameter:
One more thing
There’s something else we need to do before this will work. CORS. By default Azure Functions restricts which domains can call a function, for security. This code is going to run on our localhost:8080 port, so we need to go add this to the CORS allowed list before we do anything else.
Navigate back to the Function App (not the actual function, the app) you created in Day 3 and find the “CORS” link from the “API” section of the left-hand menu. Add to list of Allowed Origins with the value: http://localhost:8080 similar to as shown below:
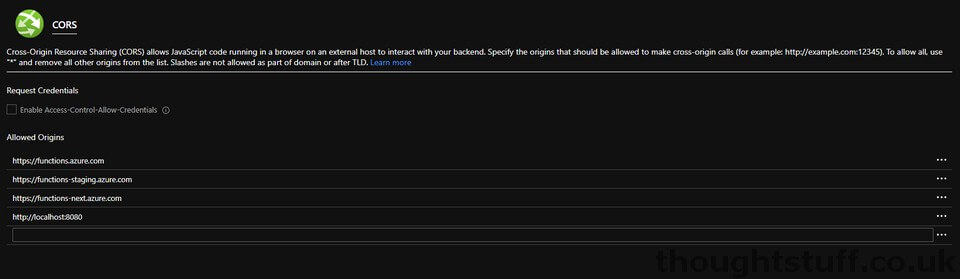
Remember to click Save to ensure this change takes effect.
Let’s test it out!
Make sure both index.html and client.js files are saved, then use this command-line command to build and run your application. If there are any compile errors then you’ll see them in the command line, otherwise, open a web browser to localhost:8080 and you should see your calling page with the test call ID pre-populated.
npx webpack-dev-server --entry ./client.js --output bundle.js --debug --devtool inline-source-map
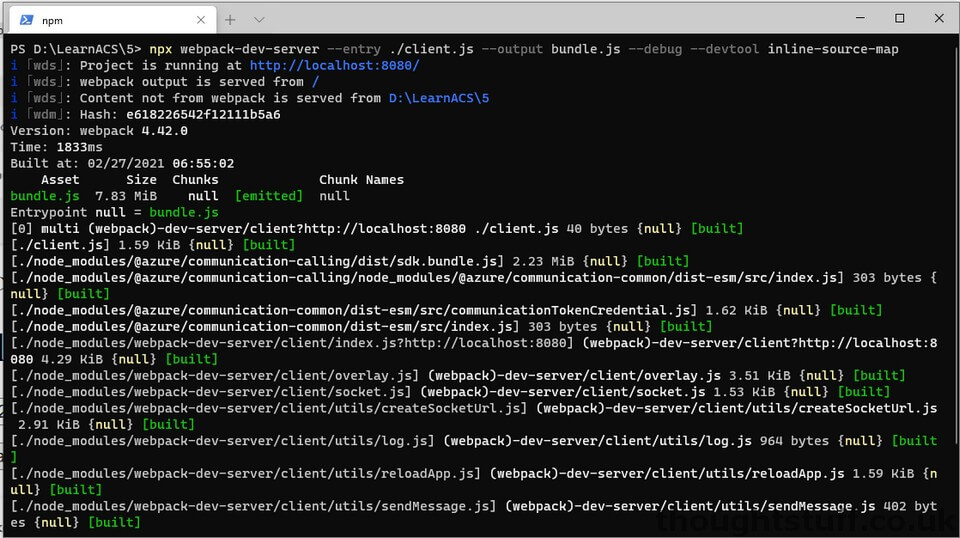
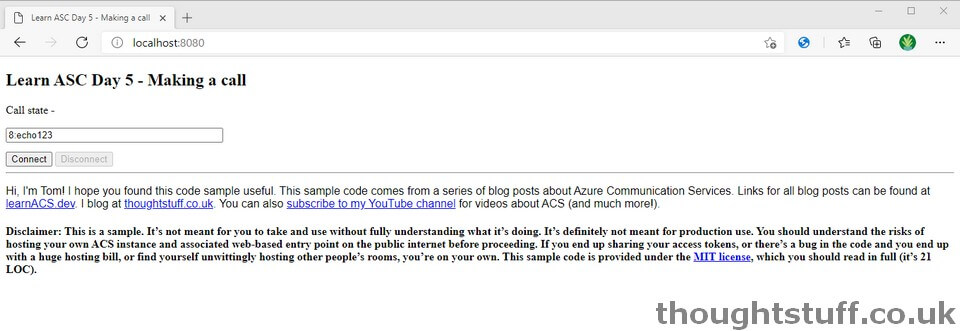
If the “Connect” button is enabled (or becomes enabled after a few seconds) then it means that the page has successfully received an ACS access token from your Azure Function. You can see this happening if you look in the Network tab of Developer Tools.
Clicking Connect should then place an audio call to the ACS test service and you will hear a voice telling you to record a message, which is then played back to you. The page will use your default audio device as the speaker, so you’re not hearing anything, check to make sure it’s not playing on another device. You can also see the call state updating to reflect what’s happening with the call.
What’s the code doing?
Now that we have something working, let’s look at what the code is doing. The index.html file doesn’t have anything special in it, just the buttons and elements we need to control the call.
- Lines 17-22 are where the front-end code retrieves an access token from our Azure Function. If this doesn’t work correctly, nothing will work, so if you are having problems, make sure that the token is being received over and placed into the token variable. In particular, there’s a slightly messy “item1” property (see Day 3 for more information on this) which might get cleared up over time, so if that can’t be referenced check it hasn’t changed names.
- The only other piece of setup that needs to happen before we can make a call is line 15, instantiating a new CallClient.
- Lines 27-38 are the event handler for the Connect button. As you can see, actually making the call is really simple: it’s a single line (29) that takes as its parameter the destination of the call to make.
- In the same way, hanging up a call is a single line of code (line 41)
- Everything else is state management of the buttons or the connection state. There are a number of different events that you can subscribe to on the Call instance: in the code, we are subscribing to stateChanged but you can also subscribe to changes in the participant list, screen sharing becoming active etc etc. The full list of events and properties for the Call object are detailed in the Call Interface documentation.
Today we used ACS to make an outbound VoIP call using WebRTC! Links for all blog posts can be found at learnACS.dev. You can also subscribe to my YouTube channel for videos about ACS (and much more!).
Written by Tom Morgan
 Tom is a Microsoft Teams Platform developer and Microsoft MVP who has been blogging for over a decade. Find out more.
Related posts:
 Learn Azure Communication Services Day 3 – Let’s Code! Creating a back-end Token Issuing Function in Azure Functions
Learn Azure Communication Services Day 1 – What is Azure Communication Services (ACS), an Introduction
Learn Azure Communication Services Day 2 – How does ACS Work? (high-level)
Learn Azure Communication Services Day 3 – Let’s Code! Creating a back-end Token Issuing Function in Azure Functions
Learn Azure Communication Services Day 1 – What is Azure Communication Services (ACS), an Introduction
Learn Azure Communication Services Day 2 – How does ACS Work? (high-level)
 With Teams Interop for Azure Communication Services, developers can finally create native Web and Mobile experiences
Learn Azure Communication Services Day 4 – ACS vs Microsoft Teams: the discussion
With Teams Interop for Azure Communication Services, developers can finally create native Web and Mobile experiences
Learn Azure Communication Services Day 4 – ACS vs Microsoft Teams: the discussion
I am glad that I find your post online. There are some updates on the ACS library which breaks the code
Line 20 in Client.js, it should be: const token = responseJson.value.item2.token;
Line 28 in Client.js, it should be: const destinationToCall = { id: destinationUserElement.value};
Hi Tom!
Is 8:echo123 still working? It’s giving me “Invalid CommunicationUser identifier specified”.
Hi – yeah I hit the same problem. The way you call the echo bot has changed slightly, and you now have to pass {id: ‘8:echo123’} to call the echo bot, but still pass {communicationUserId: ‘userId’} to call regular users. I’ll update the blog post now to reflect that – it’s a bit confusing.
Got it. Yes, “id” worked for echo bot. Will take note of that. Thanks!
Hi Tom, how can I configure my own echo bot and what would be the identifier to call it from ACS ?
And do we still need to use communicationUserId for calling regular users and Id for calling bots ?