


Learn Azure Communication Services Day 10 – Showing and Hiding Video
This blog post is part of a series called “Learn ACS“, all about Microsoft Azure Communication Services. The series covers a high-level overview of capabilities and considerations, then dives into the development detail of using ACS in your application. Find the rest of the posts in the series at learnACS.dev.
In this blog post, we’re going to add video to our Day 5 audio-only sample. You could also use the Day 8 Teams Interop sample instead if you’d rather add video to that. The nice thing about the calling SDK in Azure Communication Services is that the code is the same regardless of where you are connecting to.
I’m going to assume that you have already followed all of the steps in Day 5 to get the sample code up and running. Replace the contents of index.html and client.js with these versions. We’ll talk about how they are different once everything is up and running. Don’t forget: on Line 18, replace the placeholder text with the full URL of your Azure Function created in Day 3, including the code parameter. Also, note there are additional import statements in this code, so if you’re adding to an earlier sample, be sure to include them:
index.html
client.js
Testing it out
Make sure both index.html and client.js files are saved, then use this command-line command to build and run your application.
npx webpack-dev-server --entry ./client.js --output bundle.js --debug --devtool inline-source-map
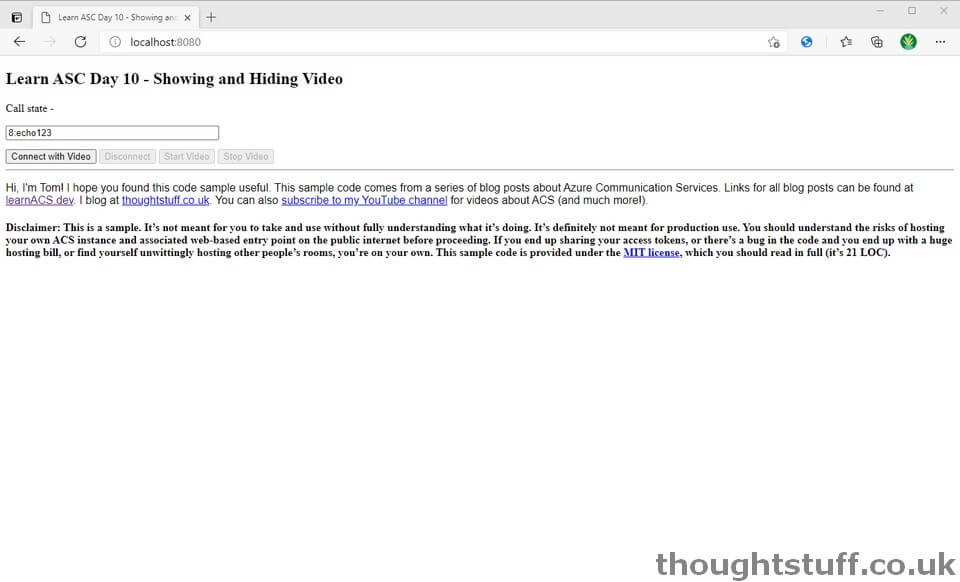
You can test out this sample using the EchoBot endpoint that’s the default in the calling text box, because your video is also shown locally. You could also connect to a Teams Meeting (see Day 8) and verify that video is shown in the Teams meeting.
What’s the code doing?
- This sample involves retrieving details of a local camera, which is done in lines 30-33 using the ACS DeviceManager, which is a nice abstraction to the collection of available video cameras. For the sample, I’m just choosing the first one but in a production system, you might provide users with a choice of available cameras. It’s also necessary to create a localVideoStream which is the actual video feed from the camera. This is used to send when making the call and also used in any local representation of the video feed.
- To start a call with video, create and pass an options object, shown in line 40.
- It’s completely possible to start a video call in ACS without ever showing the video locally, but unless there’s a good reason for it, it’s a bit unnerving and odd to not show the local video to the user. Once a localVideoStream has been created you can create a View and then attach it to a div (or any other HTML element that can accept child nodes). Lines 74-78 show this, with lines 80-83 removing it again once the Stop Video button has been clicked.
Today, we took our existing ACS code and added video functionality. Tomorrow we’re going to expand this sample by adding the ability to change devices. Links for all blog posts can be found at learnACS.dev. You can also subscribe to my YouTube channel for videos about ACS (and much more!).
Written by Tom Morgan
 Tom is a Microsoft Teams Platform developer and Microsoft MVP who has been blogging for over a decade. Find out more.
Related posts:
 Learn Azure Communication Services Day 8 – Microsoft Teams Meeting Interop
Learn Azure Communication Services Day 6 – Receiving a peer-to-peer VoIP WebRTC call
Learn Azure Communication Services Day 5 – Making a peer-to-peer VoIP WebRTC call
Learn Azure Communication Services Day 1 – What is Azure Communication Services (ACS), an Introduction
Learn Azure Communication Services Day 3 – Let’s Code! Creating a back-end Token Issuing Function in Azure Functions
Learn Azure Communication Services Day 8 – Microsoft Teams Meeting Interop
Learn Azure Communication Services Day 6 – Receiving a peer-to-peer VoIP WebRTC call
Learn Azure Communication Services Day 5 – Making a peer-to-peer VoIP WebRTC call
Learn Azure Communication Services Day 1 – What is Azure Communication Services (ACS), an Introduction
Learn Azure Communication Services Day 3 – Let’s Code! Creating a back-end Token Issuing Function in Azure Functions