


Your first Web App Bot – using the local Bot Framework Emulator
If you’ve attended any of my talks recently that involve bots in Microsoft Teams, then you’ll know that I show how to start with the Web App Bot in Azure, download the source locally and then use the Bot Framework Emulator to test your application locally as you build it out. When I show this, due to time constraints, I often gloss over some of the detail and I’ve had several people ask me for more information, so I thought I’d go through the process here.
Let’s begin at the point where you’ve already created a Web App Bot, downloaded the source code and it’s running in Visual Studio. I’m going to assume that you’ve started with a sample rather than a completely blank bot, otherwise there’s nothing to test in the Emulator. When you run the project, this (or a slight variant depending on your sample) is what you see:
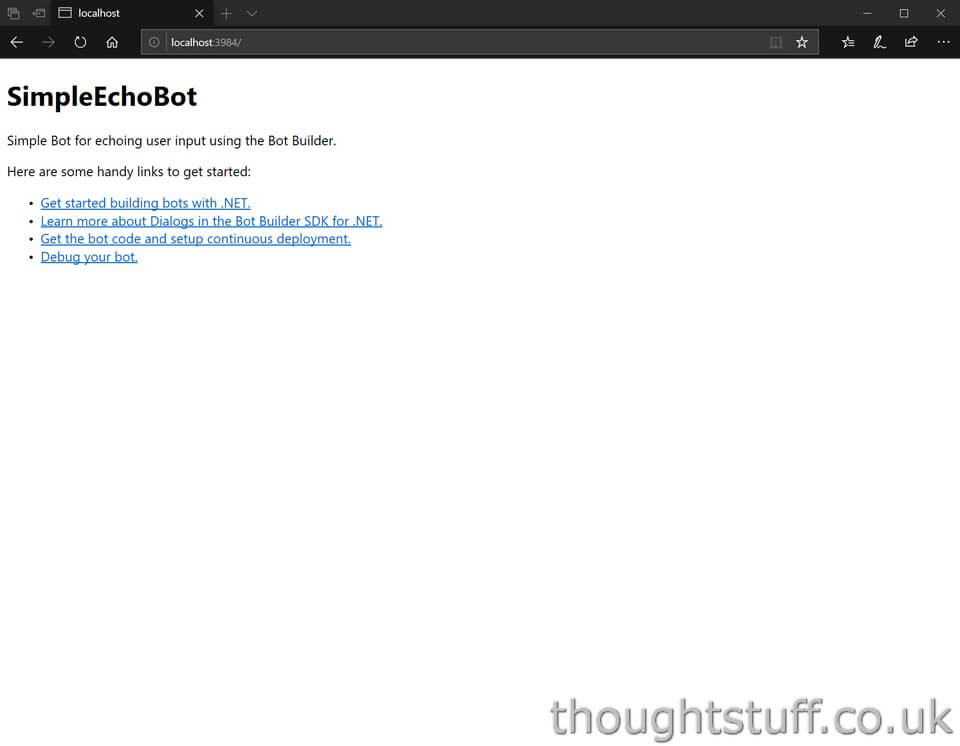

What does this mean? It means that your application is running, and is waiting for input from the Bot Framework. When a user talks to your bot, Bot Framework makes an API call to your code, and your code responds with the message. Bot Framework then sends that message on to the user. Right now, your sample code is an API waiting for something to happen. That’s why all you see is a placeholder webpage – there’s nothing else to show. The webpage isn’t even really required, it’s just to make you feel better that something is happening.
If we had published our code online (such as in Azure) then we would give Bot Framework the URL of our application and we’d be off. But, we want to run this locally first. Therefore we need something that looks and acts like the Bot Framework, which can talk to our application and give it the messages it’s expected so that we can see it in action. That’s what the Bot Framework Emulator does.
How to get the Bot Framework Emulator
The Bot Framework Emulator is maintained by Microsoft on GitHub. Download the most recent version from the Releases tab here:Â https://github.com/Microsoft/BotFramework-Emulator/releases. It should look something like this when opened (this screenshot as of April 2019):
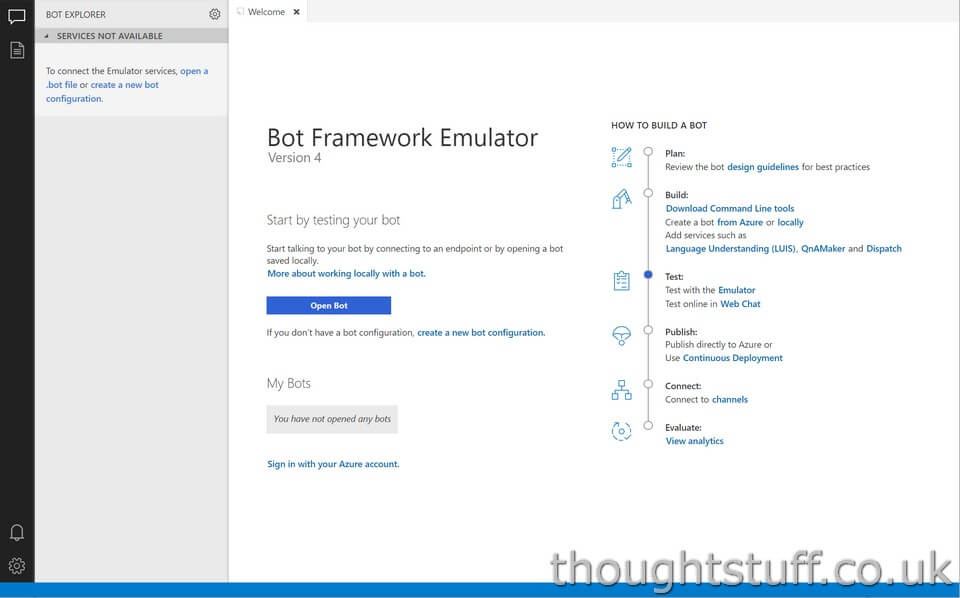
The Bot Framework Emulator has really expanded in functionality since inception and there is now a lot that it can do. On the right hand side you can see a good flow diagram with links to guidance around building. There is also Azure integration and built-in support for ngrok, but I’m not going to cover any of that here – I want to focus in on just what’d needed to get started with your first bot.
What we need to do is tell the Emulator about the code we have running. To do that, we need the URL of our application, which you can find from the browser window that opens when you run your code. In our example above it’s: http://localhost:3984.
However, that’s just the URL of the index HTML page that we’re seeing. What we need is the URL of the API endpoint that will receive our messages. This is the same for all Bot Framework applications (because it’s the API endpoint that the Bot Framework will call) and is /api/messages. So, our full URL to give to the Emulator is: http://localhost:3984/api/messages.
In the Emulator, underneath the Open Bot button, click Create a new configuration.
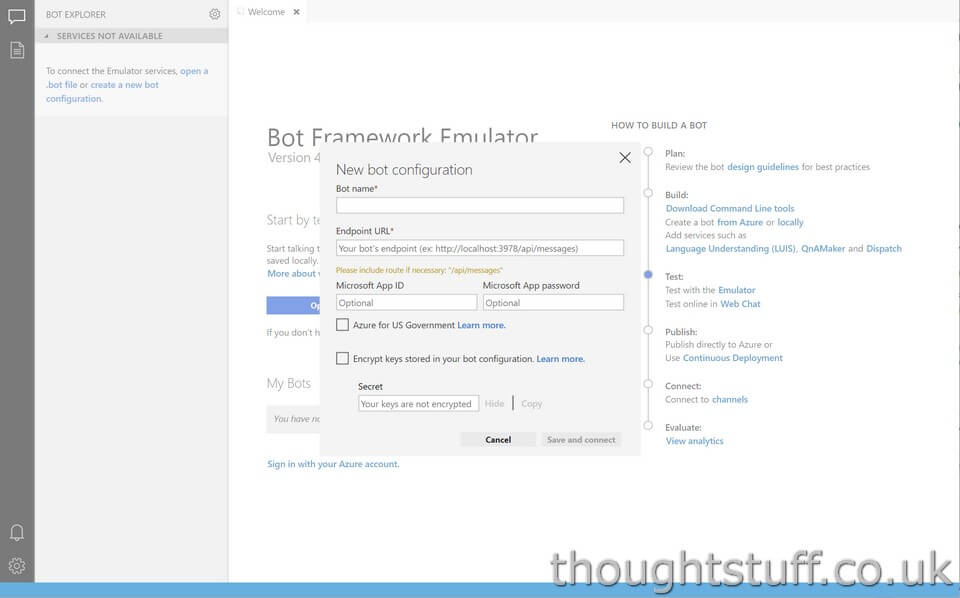
Fill in the bot name (this is just a friendly name so you can recognise it in the Emulator later). For the Endpoint URL, specify the URL you just built up. You can leave everything else blank/default and click Save and Connect.
You’re then prompted to save your configuration in a .bot file, making it easier to open later via the Open Bot button.
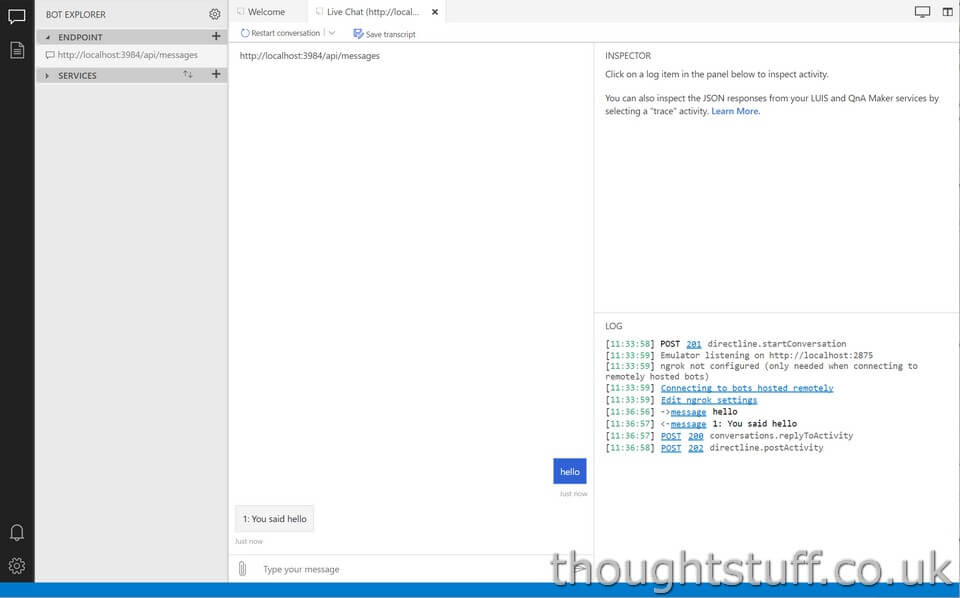
Once you’ve done this a new Live Chat tab should be created. This is your portal to interact with your application:
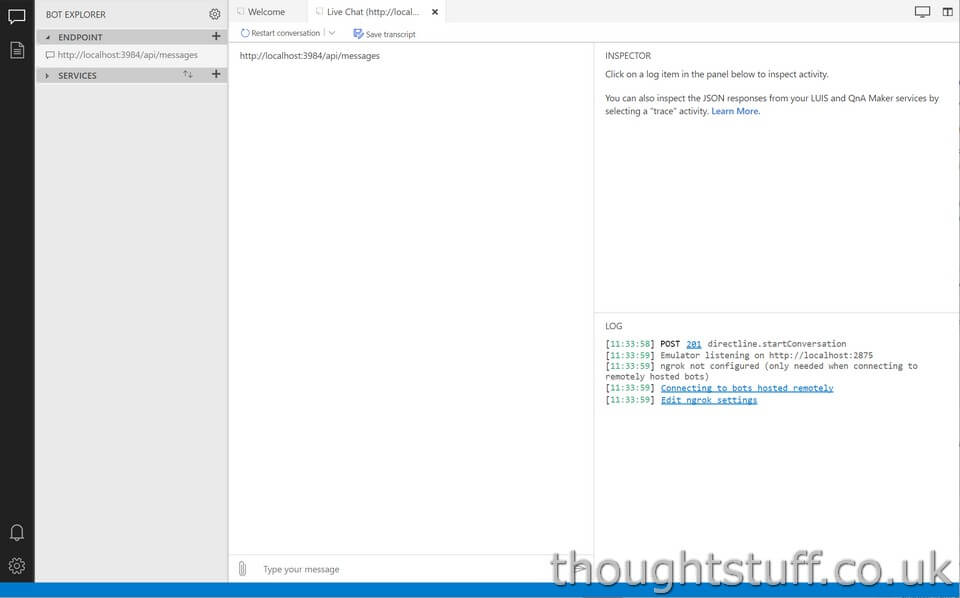
Notice that you have a standard conversation window where you can send and receive messages. Sending a message will run your local application code and any response will be shown:
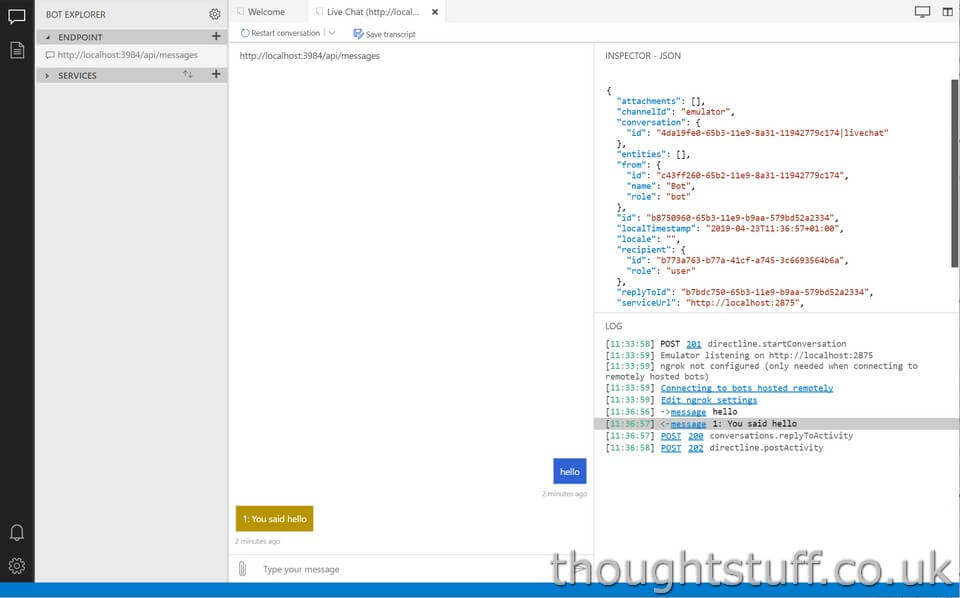
On the right-hand side you also have a log showing the messages flowing between the Emulator and your application. In addition, if you click any message then you can see the full JSON object which represents the message. This can be useful for advanced flow scenarios or troubleshooting:
Finally, just to prove that we’re running local code, and to show how useful the Emulator can be when building up an application, let’s add a breakpoint in our code. In Visual Studio, add a break-point somewhere that you know will be hit for each message. This varies from sample to sample, but if you’re not sure, search the solution for something you know gets returned by the bot, for instance, “You said”. Making sure that your application is still running, switch back to the Emulator and send your bot a message. Your breakpoint should be hit, and you can now examine all variables, examine your code flow, troubleshoot etc etc.
Written by Tom Morgan
 Tom is a Microsoft Teams Platform developer and Microsoft MVP who has been blogging for over a decade. Find out more.
Related posts:
 Run your app in Teams, but debug locally using ngrok: here’s how
 How to enable your Bot Framework bot on Skype for Business: Part 2 (or how I followed the instructions and it worked!)
Creating a Microsoft Teams IVR Bot Part 2 – The Sample Code
Bot Framework Channel Inspector lets you easily compare platforms
How to enable your Bot Framework bot on Skype for Business: Part 2 (or how I followed the instructions and it worked!)
Creating a Microsoft Teams IVR Bot Part 2 – The Sample Code
Bot Framework Channel Inspector lets you easily compare platforms
 Weekly Update 12 August 2018: HTTPS for local development with .NET Core, Ignite 2018 – what to expect