Walkthrough: Creating a UCMA Application & Application Endpoint
If you’re creating UCMA Applications, you’ll need to create both applications and application endpoints.
I’m going to assume that you already have a configured UCMA application server, and that you (or someone) has created an Application Pool.
Step 1 – Find the Pool
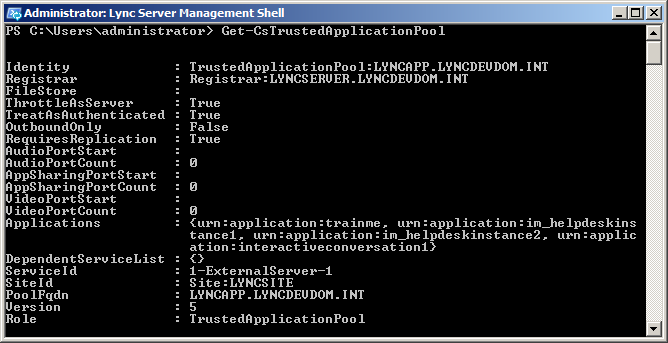
When you create an application, you need to tell Lync which application pool you want to run it on. If you don’t know which application pool to use, you can use the following PowerShell command from the Lync Server Management Shell:
Just running that without any other parameters will give you a list of pools. You need to make a note of the Fully Qualified Domain Name (PoolFqdn) at the bottom of the readout:
Step 2- Create the Application
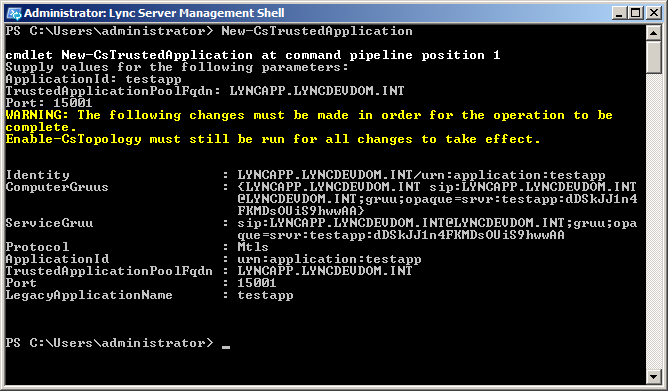
To actually create the application, use the New-CsTrustedApplication command. There are quite a few optional parameters you can pass, but if you’re unsure just issue the command and PowerShell will prompt you for the required parameters. These are the ApplicationID, a unique key used to identify your application, the port through which the application will be accessed, and the Fully Qualified Domain Name (FQDN).
You’ll get a warning in yellow about needing to run Enable-CsTopology, so go ahead and run this now.
Step 3 – Create Application Endpoint(s)
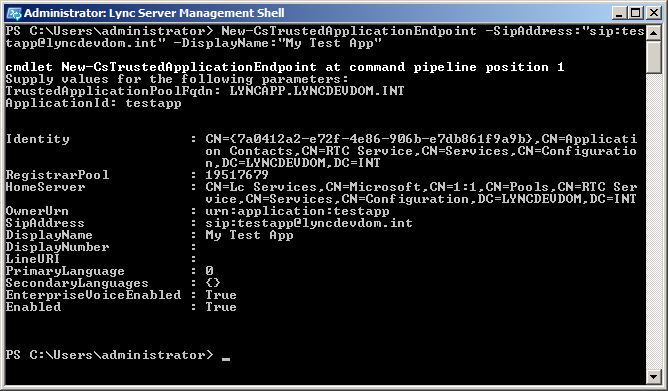
The endpoints are the actual SIP addresses by which users will interact with your application. You can have more than one, but you need to have at least one for your application to be useful. To create the endpoints you need to know the PoolFqdn and the ApplicationID of the application you just created.
If you just issue the New-CsTrustedApplicationEndpoint command you will only get prompted for the required parameters. The SIP Address and Display Name aren’t required parameters and you won’t get a chance to put them in (Lync will create a random string sip address for you!). Being able to choose the SIP address of the endpoint is pretty important, as is the display name, so let’s pass them as optional parameters when we call New-CsTrustedApplicationEndpoint:
You can test that everything has been added correctly, or just review your applications and endpoints, using the Get-CSTrustedApplication and Get-CSTrustedApplicationEndpoint commands.


Thanks for this article, always an easy watch or read. 🙂
I’ve got a bit of an issue in general which would be great if you could help clear up as I’ve found the documentation on MSDN slightly confusing…
Whilst everything is there, it seems to be a bit hazy around the area of the trusted application pool itself.
I’d thought that you would have a single trusted application pool capable of running many trusted applications, each application would need (at least one) trusted computer (trusted by the app pool) to run from.
Trusted computers themselves need a few things in order to support the recommended auto-provisioning model (central management store etc.).
However, it seems that when you first create the trusted application pool you have to know ahead of time the FQDN of another computer which will run apps and therefore be a trusted computer, as if you don’t enter it during creation you’re not allowed to do it later.
This seems a bit backwards (although I’m sure there’s a reason) as it’s pushing more and more responsibility onto the app server that runs the app to be ready beforehand and have all these prereqs installed to handle replication.
The documentation also seems to suggest that every app you provision needs an app pool, takes you through the steps but doesn’t clarify if it should be using an existing pool or a new one.
In creating apps I’m trying to maintain as much separation between the code/app and infrastructure setup as possible, so clarity would be greatly appreciated if you can offer any.
Thanks
peteski
Hi Tom,
I am pretty new at Lync development. I am trying to build a simple UCMA service to pull the status of a database of Lync users. I am testing my connectivity using a sample code from the UCMA 4.0 SKD “SubscribePresenceView” and it is returning “Unable to perform authentication of credentials.”.
One thing that I have noticed is that, using the same credential, I am able to connect a 2013 Lync client in auto configuration mode, but not in manual mode. Even when the auto configuration connects to the exact same Lync server address than I am attempting in manual configuration.
My question is, is there a way to create a UCMA app that uses auto configuration?
I would greatly appreciate your help.
Regards,
Guillaume