

The Skype Web SDK now works with Office 365! Previously limited to on-premise customers only, the latest SDK from the Skype for Business Team is now available to cloud customers also. But how do you use it? This is my big step-by-step, soup-to-nuts guide to going from nothing to a working code sample.
[box type=”info”] Aside: Soup to Nuts. I love this phrase. It’s not common in the UK, but I kept hearing it in the US, and I had to infer its meaning way before I actually understood what it meant. It means ‘from beginning to end’ and describes a multi-course meal, such as in a restaurant – the soup being the starter, and the nuts being part of the desert.[/box]
Prerequisites
First things first, you will need an Office 365 Skype for Business tenant. If you don’t have one already, here’s the plans & pricing page. It’s a subscription model based on the number of users you need. Or, you can sign up for free, one-year Office 365 Developer account:Â https://msdn.microsoft.com/en-us/library/office/fp179924.aspx#o365_signup. Make sure you set up at least one user (such as yourself) with access to Skype for Business and test it out using the client before continuing. That way, you know everything is good on the back-end.
You’ll also need an Azure account. If you don’t already have one, here’s a link to a free trial with £125 of free credit: https://azure.microsoft.com/en-gb/pricing/free-trial/. You’re welcome.
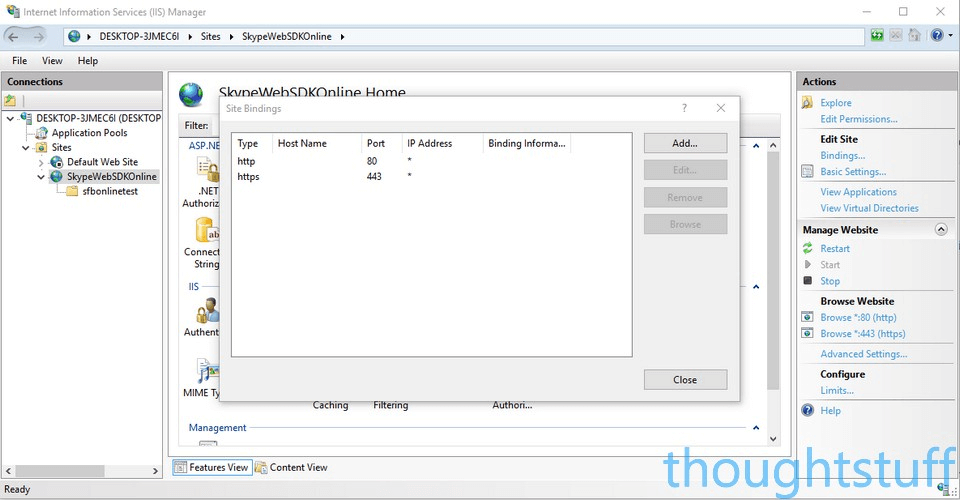
In this post, I’ve assumed that you’re running on localhost in an application called sfbonlinetest, and that you’re using https. You don’t need to be running https to use Skype Web Online – everything here will work just fine using http.
For clarity: this is what my IIS looks like for this sample:
1. Link Azure & Office 365 accounts together
You need to link your Azure and Office 365 accounts together so that you can create and manage your cloud application in Azure but have it work with Office 365. See this MSDN blog post on associating your Azure subscription with your Office 365 subscription.
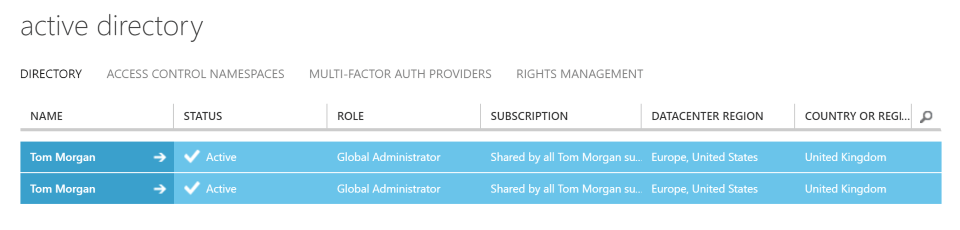
Once that is done, you’ll probably have two entries in the Azure Active Directory list (the default Azure one and the newly associated Office 365 one). If, like me, they’re both confusingly called the same thing, then you can use the Domains tab to work out which one is which:
2. Create a New Application
Select the associated directory, and then Applications. Click Add to add a new application:
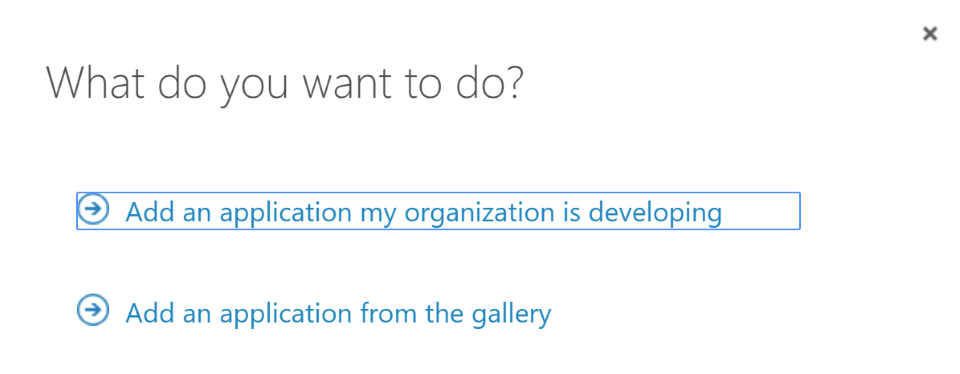
Choose “Add an application my organization is developing”. Â Provide a name and leave the default of “Web Application and/or Web API” selected.
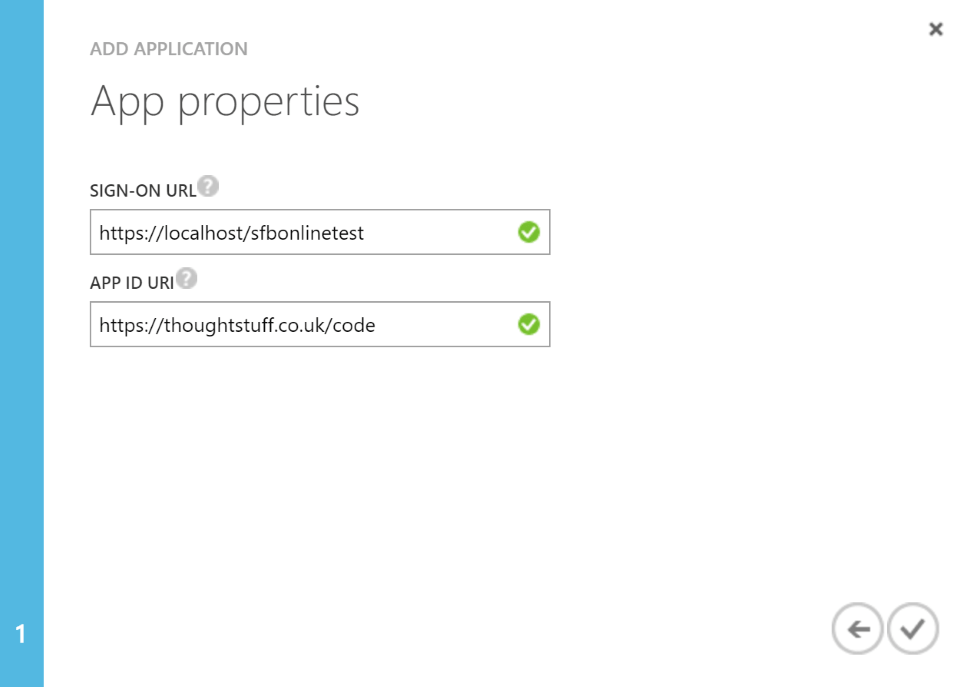
Click the arrow to continue. Now, you need to provide the sign-on URL for your application and a unique App ID URI. They can be the same thing, and in a lot of cases I think they probably will be. The App ID uniquely identifies your application to Azure. The sign-on URL is where you will run the code that will authorise your user. This makes this field quite important. Essentially, this is where your Web SDK application runs. You can change this later, but if you’re going for getting something working now, you can use http://localhost/sfbonlinetest and follow the rest of the instructions in this guide:
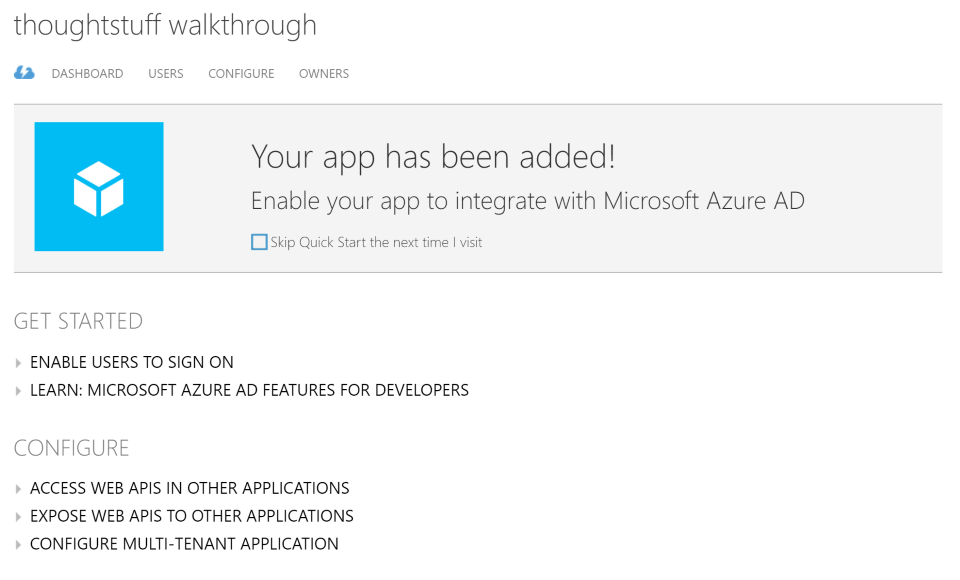
Click the tick and the application will begin provisioning. This only takes a few seconds and when it’s done, you should see its Quick Start page:
3. Configure Your Application
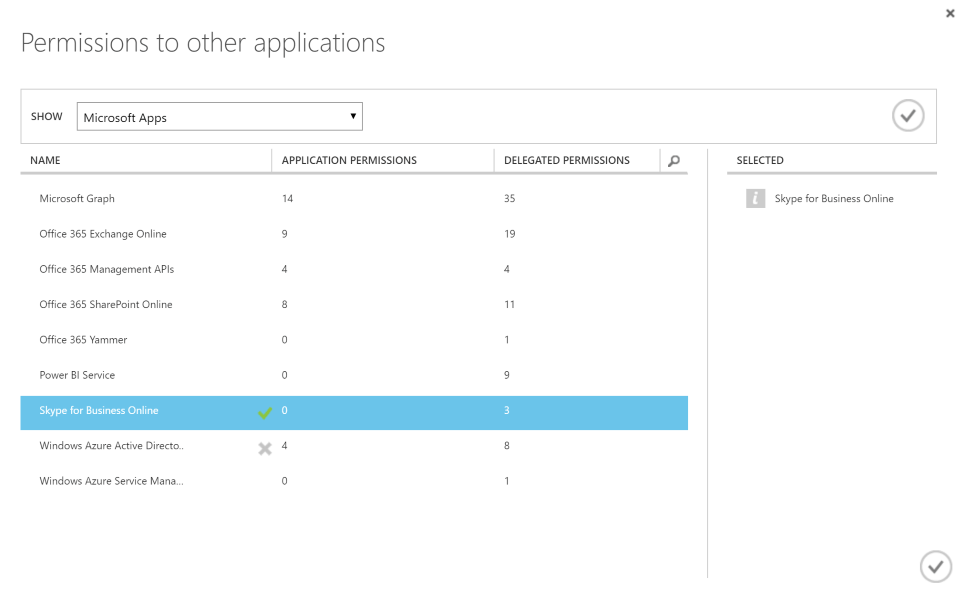
Click Configure, then scroll down to the bottom to section “permissions to other applications”. Click “Add application”. Click the + icon next to “Skype for Business Online” to allow your new application access to Skype for Business:
Once you’ve saved this change and are back on the Configure page, this is also a good time to make a note of your Client ID, as you’ll need this later on.
The next change you have to make to allow your application to use OAuth implicit grant flow. This is how your application will get an access token which it can then use again and again on each page. Unfortunately, allowing OAuth implicit grant flow is not yet an option that’s made it into Azure’s Web UI, so you have to jump through a few hoops to make it work.
On the Configure page for your application, click the Manage Manifest button from the menu bar at the bottom of the page, and click Download Manifest. This will download the manifest JSONÂ which represents your application. Locate and open the file in a text editor such as Notepad.
Line 15 contains the key  “oauth2AllowImplicitFlow”: false. Change this value to true to allow it, and save the file.
Now go back to Azure, select Manage Manifest again and this time choose Upload Manifest. Select your edited file and upload it to apply the new settings. The page will reload and your new setting is saved. You can’t see it anywhere, but you could download the manifest again to verify that it’s been changed.
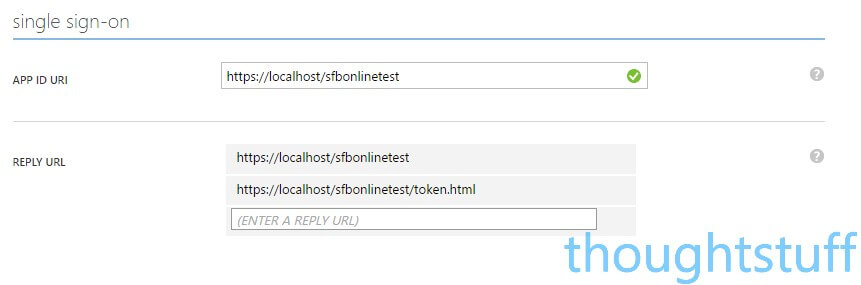
4. Single Sign On Settings
Just above the permissions section is a ‘Single Sign-on’ section. You need to add two Reply URLs into here: one for https://localhost/sfbonlinetest and one for https://localhost/sfbonlinetest/token.html. At this point you should also create a 0-byte file called token.html and save it to your sfbonlinetest folder to make the second URL valid. I’ll explain why in a bit.
5. Write Some Code
Time to start coding! In this post we’re only going to go as far as signing in – this page is long enough already!
I’m going to use Notepad++, but you can use any text editor. Regardless, create an index.html file and save it to your sfbonlinetest folder. Let’s start with the outline:
<html>
<head>
<script src="https://ajax.googleapis.com/ajax/libs/jquery/2.1.1/jquery.min.js"></script>
<script type="text/javascript" src="//swx.cdn.skype.com/shared/v/1.2.9/SkypeBootstrap.js"></script>
<title>ThoughtStuff Skype Web SDK Online Test</title
</head>

<body>
</body>
</html>
You’ll notice I’ve included both JQuery and the Skype Web SDK bootstrap JavaScript files, just as if we were writing a on-premise Skype Web SDK page. I’ve also created a placeholder for us to write any changed to the client state – this will allow us to see that we have logged in.
The first thing that’s different between an on-premise Skype Web SDK sample and a Skype Web SDK Online sample is that we need to go to Azure to authenticate ourselves. When our user first loads this page we need to check to see whether they are already logged in, and if they aren’t then we need to kick them Azure first to sign-in. We do this with access tokens and client IDs. If we don’t have an access token from Azure then we’re not authenticated, and when we authenticate to Azure we pass it the client ID of our application. That way Azure knows whether the person signing in is authorized to use the application. This “redirect to Azure if not signed in” code should be one of the first things your application does:
if (!location.hash) {
location.assign('https://login.windows.net/common/oauth2/authorize?response_type=token' +
'&amp;client_id=YOUR_CLIENT_ID_HERE' +
'&amp;redirect_uri=' + location.href +
'&amp;resource=https://webdir.online.lync.com');
}
If we get past this code, then it’s a fair assumption that we’ve been to Azure and back again and that we now have an access token. We should check for this though, before we try and go any further – just in case:
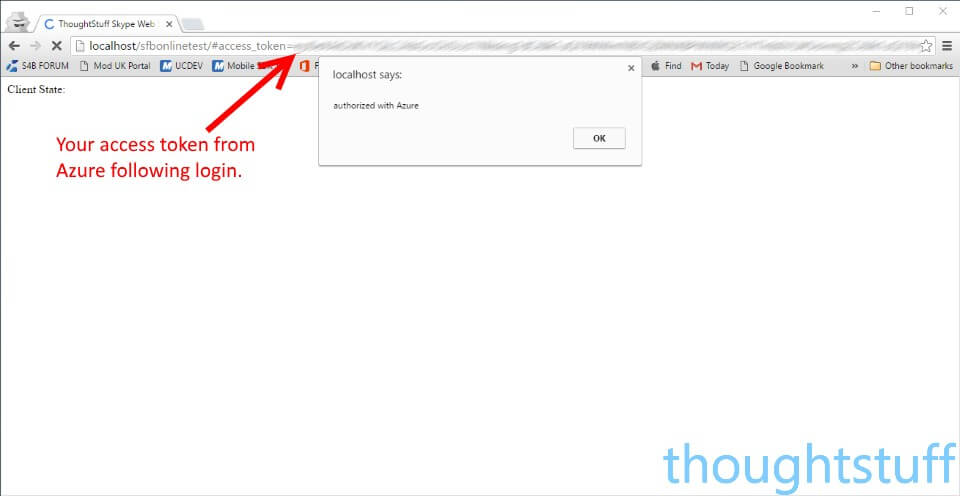
if (/^#access_token=/.test(location.hash)) {
window.alert("authorized with Azure");
InitialiseSkype();
// Use Skype Web SDK to start signing in
}
In the sample above, you can see that I’m checking to make sure the access token exists, and if it does then I’m calling InitialiseSkype() (apologies for mixing UK and US spelling!). The code to initialize the Skype object is unchanged from the on-premise Skype Web SDK:
var client;
function InitialiseSkype()
{
var config = {
apiKey: 'a42fcebd-5b43-4b89-a065-74450fb91255', // SDK
};
Skype.initialize({ apiKey: config.apiKey }, function (api) {
client = new api.application();
// whenever client.state changes, display its value
client.signInManager.state.changed(function (state) {
$('#client_state').text(state);
});
//once intialised, sign in
SignInToSkype();
}, function (err) {
console.log(err);
alert('Cannot load the SDK.');
});
}
I’ve pulled out the code the does the actual signing into Skype into a separate function, as it’s slightly different. Rather than passing a username and password, it’s only nessecary to pass our client ID and enough information to tell Skype to authorize via Office 365. We also need to pass a valid redirect URI – this is why we created another entry in the Single Sign-On section and a 0-byte file. The file is never navigated to so the user will never see it, but the Skype Web Online SDK code needs it there and will validate it against the list of Reply URLs in Azure.
function SignInToSkype()
{
$('#client_state').text("Signing in...");
var options = {
"client_id": "YOUR_CLIENT_ID_HERE",
"origins": ["https://webdir.online.lync.com/autodiscover/autodiscoverservice.svc/root"],
"cors": true, "version": 'ThoughtStuff/1.0.0.0',
redirect_uri: '/sfbonlinetest/token.html', // ensure this URL is in your Reply URL in Azure
};
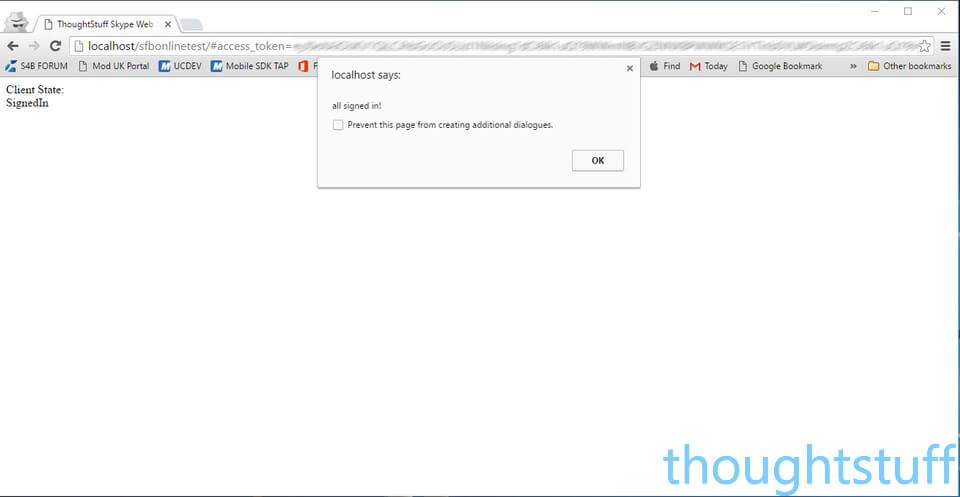
client.signInManager.signIn(options).then(function () {
window.alert("all signed in!")
//do something interesting here
});
}
6. DEMO!
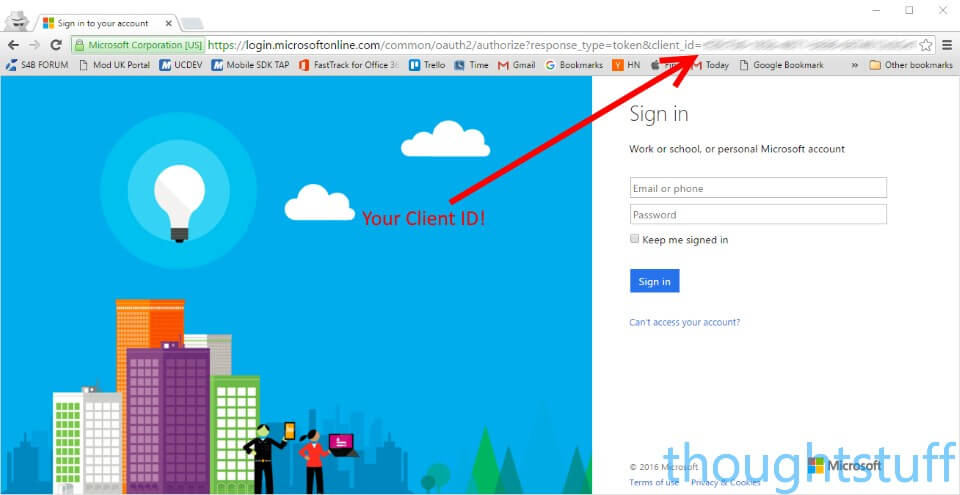
At this point, you should be able to load the page and see things happening. Firstly, you should get instantly redirected to an Azure login page. Notice how the Azure link passes your Client ID so that Azure knows what to do with the login credentials.
After logging in you should come back to your application and see that the Skype object is initialised. Notice as well that you now have an access_token from Azure representing the signed-in user.
Finally, you should see that Skype logs your user in. The web page is now logged in as the Skype Online user they signed into Azure with – but from your application! Congratulations!

[…] is the time! You can follow steps 2 and 3 (but ignore section 4 for now) from my guide post “Skype Web SDK Online â Setting Everything up â Step by Step Guide” and then come back […]