


How to: Create QnA Maker Bots in Azure
The way that Bot Framework bots were created has recently changed, moving from the Bot Framework Dashboard to Azure.
As part of that process, there’s a new way to quickly create QnA Maker bots. Previously, choosing a Question & Answer template would guide you through the process. There’s still a template, but it’s not quite so obvious what to do. So, here it is:
0.Create the QnA Maker instance
This process is the same as before – you need to have a populated QnA Maker instance in order to create a QnA Maker bot. I’ve previously covered this so won’t go over it again.
1. Create the Bot
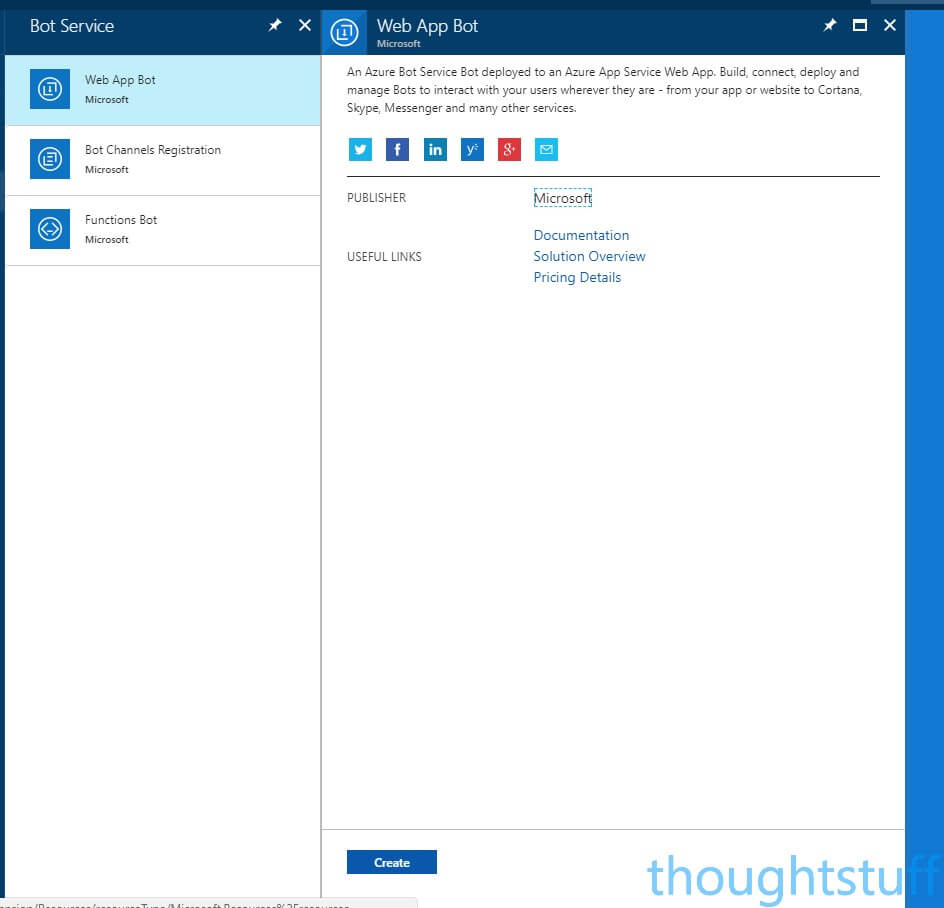
Bot Framework bots are now created in Azure.Go to the Bot Service blade, and choose Web App Bot:
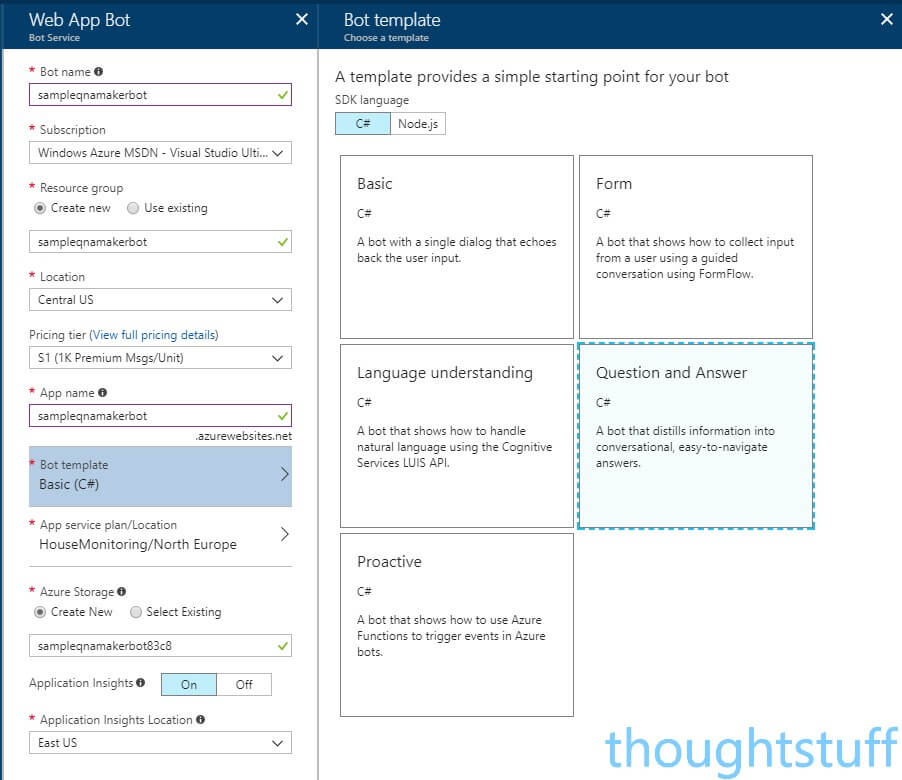
Fill in the values to choose your name, location, pricing tier etc. However, make sure that you click the Bot Template option and choose Question and Answer:
2. Test the Bot
Once the bot is created, you can immediately test it. The ‘Test’ feature from the Bot Framework has been ported over to Azure and is now called ‘Test in Web Chat’. When you do test it though, be prepared to be disappointed, with the message Please set QnAKnowledgebaseId and QnASubscriptionKey in App Settings. Get them at https://qnamaker.ai.:

This does make some sense – we haven’t yet told our bot code which QnA Maker instance it should be looking at. This is the part that was previously managed as part of creating a bot, but now we have to do it manually. The IM message references two App Settings we need to fill:Â QnAKnowledgebaseId and QnASubscriptionKey. But what are these, and where can they be found?
3. Find and populate the Keys
I can’t find this documented anywhere, but I’ve found it works – so I must have the right keys!
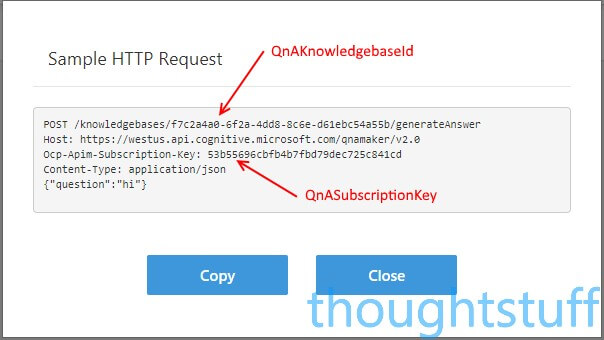
From QnA Maker, find the service you want to use, then click View Code in order to see the HTTP Post request. Here’s an example:
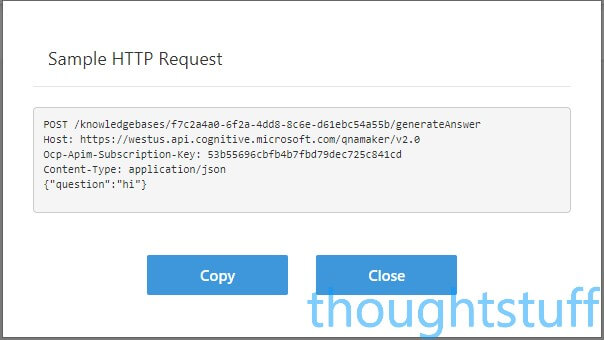
The QnAKnowledgebaseId is the first GUID in that address (after /knowledgebases/), and the QnASubscriptionKey is the second one (labeled as Ocp-Apim-Subscription-Key).
Copy these two values, then head back to Azure, and your bot service. Click Application Settings (from the menu on the left) and then scroll down until you see the App Settings section:
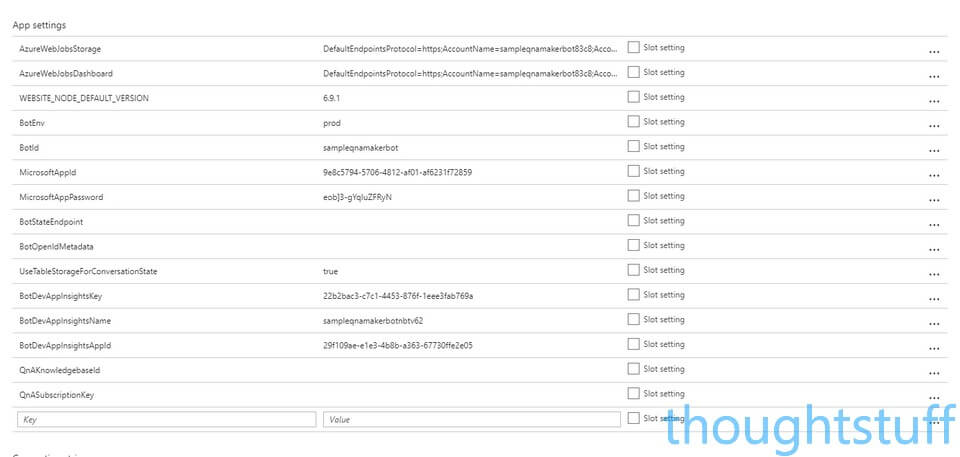
You’ll notice that there are two empty keys at the bottom, with names that match the ones we need to fill. Paste in the key values there, and click Save.
4. Test Again
You don’t need to re-compile anything, once you’ve saved you should be able to go back to the ‘Test in Web Chat’ section and test out your bot. This time, rather than getting an error, you should find that your QnA Maker instance is serving up the answers for your bot, and you’re back with a working QnA Maker Bot.
This is how things are done right now. This is an area of rapid development though, so it’s possible that this workflow might get easier, and a user interface might once again walk you through this process. However, it’s useful to know how it works under the hood, in case you ever need to change it
Written by Tom Morgan
 Tom is a Microsoft Teams Platform developer and Microsoft MVP who has been blogging for over a decade. Find out more.
Related posts:
 Stand out in search: add a bot to your search results! Part 2 – The Bot
Stand out in search results – add a bot to your search results! Part 1 – Knowledge Base
Microsoft Bot Framework Bots now work in Skype for Business Hybrid
You have less than a month to upgrade your old Bot Builder bots!
Azure Bot Service & LUIS are now GA! Here’s what’s changed.
Stand out in search: add a bot to your search results! Part 2 – The Bot
Stand out in search results – add a bot to your search results! Part 1 – Knowledge Base
Microsoft Bot Framework Bots now work in Skype for Business Hybrid
You have less than a month to upgrade your old Bot Builder bots!
Azure Bot Service & LUIS are now GA! Here’s what’s changed.
How can we detect the end of conversation in QnA Chat Bot?