


Publishing your Microsoft Teams App in the App Store – how it all works
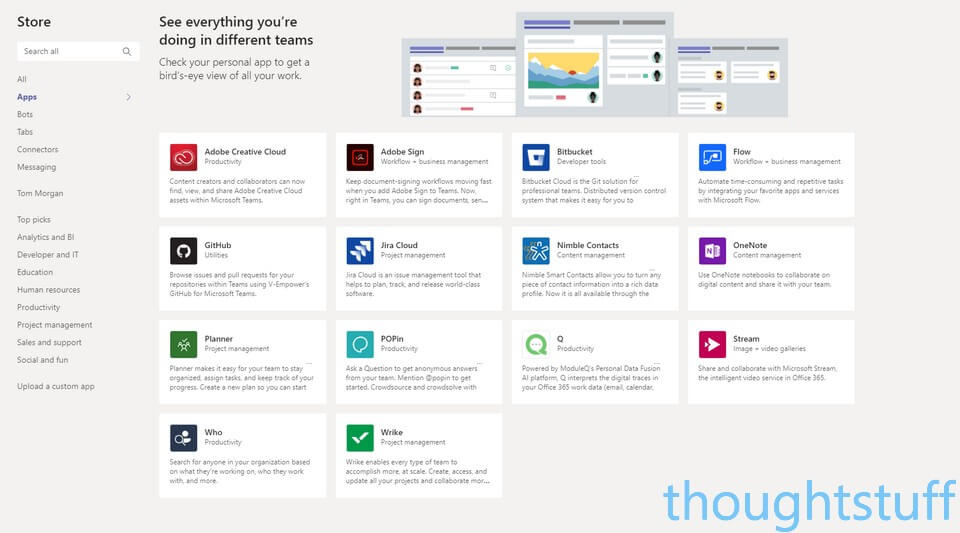
So, you’ve written a new app for Microsoft Teams. You’ve tested it out, you’ve side-loaded it and had some friends try it out – and now it’s ready for the big time. You want it to go here: the Teams App Store
But, how do you actually go about publishing a new app to the App Store. Here’s the process I recently went through to publish RememberThis – a new app which helps you stay on top of things by reminding you about important conversations that need following up.
Before you Publish
The App Store is a walled garden, meaning that any apps that go into it must be approved by Microsoft. This is done by the Office Store team, who will make sure that your submission falls within the published guidelines. In addition, for Teams apps they will also ask the Microsoft Teams product group to inspect your application. The Teams product group will take a closer look at how your application performs within Teams and will cover things like the how your app looks to users, what the first-run experience is, how your application copes with unexpected input etc.
Your app is going to get a fairly thorough inspection before it’s approved, so it’s worth making sure everything is as good as it can be before you submit. Not only is it advisable reading through the App Store Validation Policies, which cover general rules, but it’s also well worth looking at the specific guidance for Teams apps as well, which covers detail such as how your icons should look as well as links to other design guidelines for Teams apps.
Step 1 – Microsoft Seller Dashboard
It’s 2018, and publishing apps is a Serious Business. If you’re going to be allowed to put your app into Microsoft’s App Store then you need to be registered with a Seller account – even if the app is free.
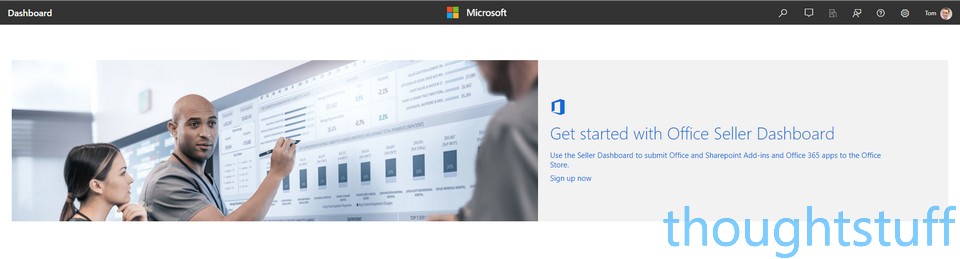
Start by going to https://sellerdashboard.microsoft.com. Pick the orange Office button and sign in. If you’ve not already registered then you’ll need to do this. One of the first things you’ll be asked to do is pick your country because there is a charge to being a seller, which varies country to country:
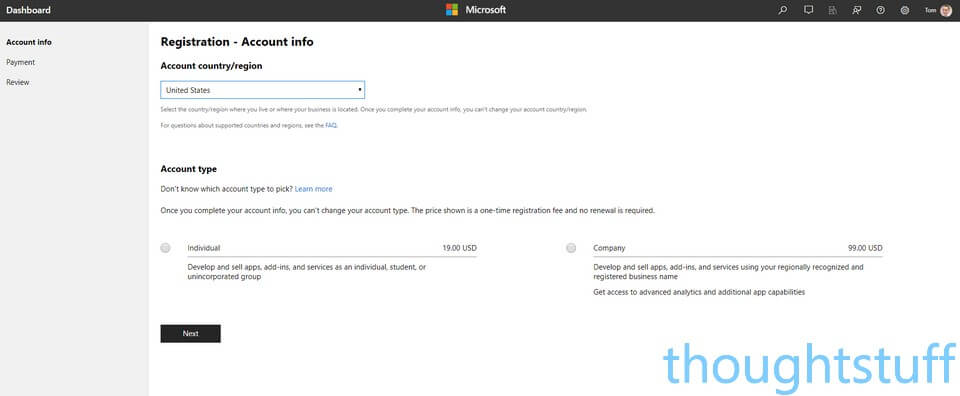
Note that the charge applies even if your apps are free. However, the good news is that this is a one-time fee, not an annual occurring one.
Once you’ve registered then your application is placed into “Pending Approval” status whilst your account information is verified. For me, approval took around 12 hours, and you’ll receive an email when it happens.
Step 2 – Add your App
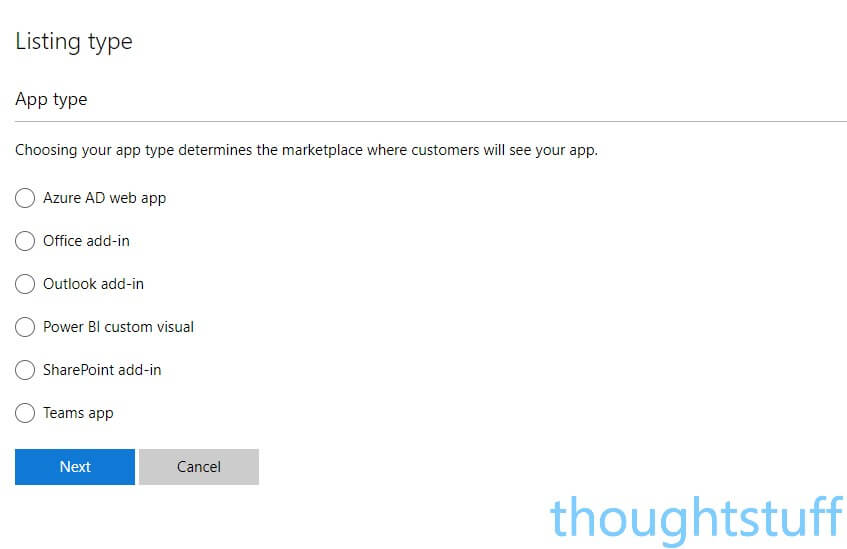
Once your Seller account is approved, you’re allowed to add apps. The default view when you log into the Seller Dashboard is a list of your apps – so all you’ll see is a big “Add a new app” button. Clicking it launches the process of actually adding in your app. There’s an impressive range of apps you can add, obviously we want to choose the Teams app at the bottom:
You’ll need to upload your manifest ZIP file, as well as provide some information about the app’s name, category etc. Top Tip: make a note of the ‘common failure reasons’ highlighted at the top as this is updated regularly based on actual failures so can help you to avoid potential pitfalls.
As well as this, you’ll need to have the following things handy – so it’s definitely worth making sure that you have them before you start the submission process:
- a link to your Privacy Policy. You should already have provided one in your app manifest file along with a link to your Terms of Service, but you’ll need to provide it again here
- your app logo. This can (probably should) be the same logo that’s in your manifest, but note that it must be a .png, .jpg, .jpeg, .gif, must be exactly 96w x 96h pixels, and must be no greater than 512 KB.
- some screenshots. You have to provide at least one, which must be .png, .jpg, .jpeg, .gif, must be exactly 1366w x 768h pixels and no greater than 1024 KB. The screenshots are verified by a real human and need to be of a pretty good standard. 1366×769 is quite a large size, so if your app is a bot without any tab pages then it can be hard to show that without compromising on quality. There are some tips on how to provide good screenshots here, which I highly recommend you read. I fell down on this – as you’ll see below.
As part of the app creation process, you can also integrate with a CRM system if you have one.
The last step of the process is the pricing section, though this is (I guess) only here because the creation process is the same for different types of apps. If you were hoping to retire on the sales of your new app, I’m afraid I have bad news for you, in the form of validation policy 14.1:

Yep, you can’t charge money for Teams apps. The pricing section in the app creation wizard only lets you choose “free app”, there are no other options.
Step 3 – Wait for Feedback
Once you’ve filled everything in, click the final Submit button, and then you’ve done all you can for the moment. Your app will go into the submission queue.
I called this section “wait for feedback” rather than “wait for approval” because nearly everyone needs to submit their app more than once before it’s approved (source).
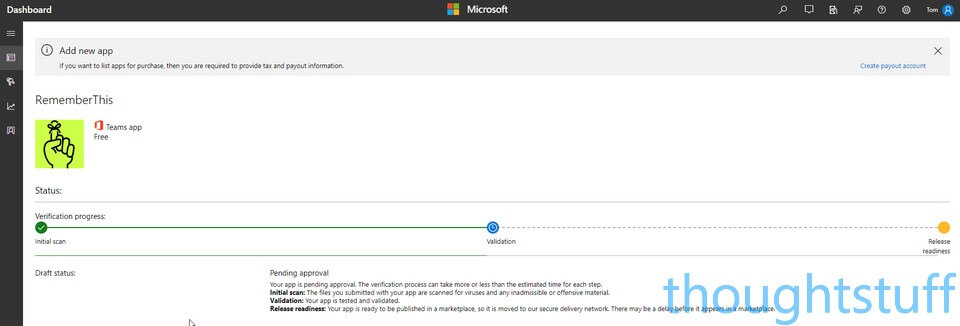
I found that feedback happened within a few days. You’ll receive an email telling you either that your app has been approved or, more likely, that some changes are needed. Heading back to the Seller Dashboard, you’ll see your application listed with “Changes requested” next to it. Following the links, you’ll eventually be able to download a report detailing what changes are necessary:
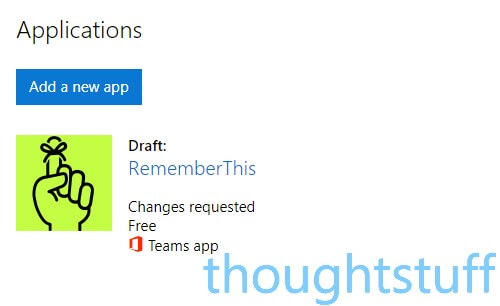
Your app shown on the initial Seller Dashboard, indicating changed are required
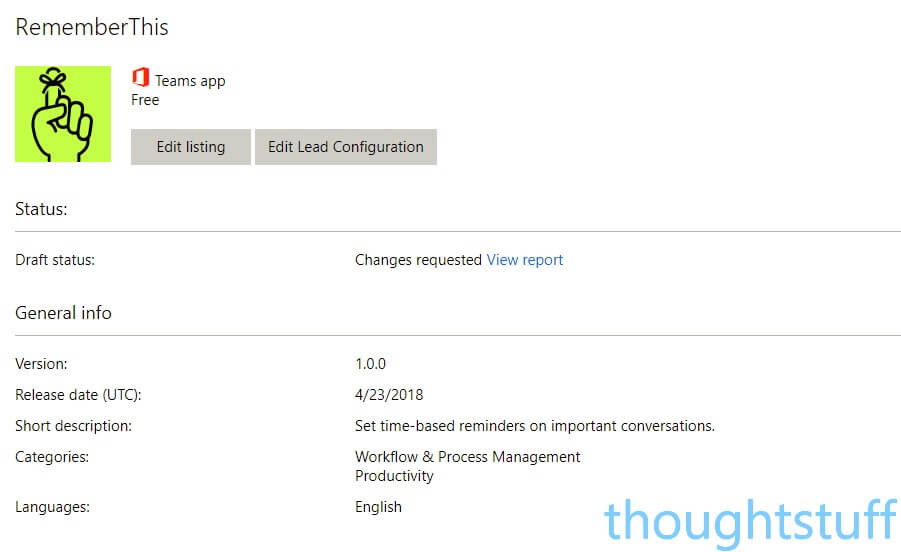
Details of your app, with the status indicating that changes are needed, and providing a link to the testing report
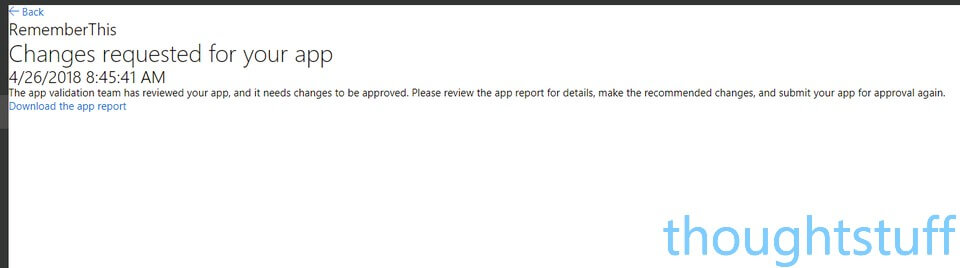
This page contains the actual link to the testing report.
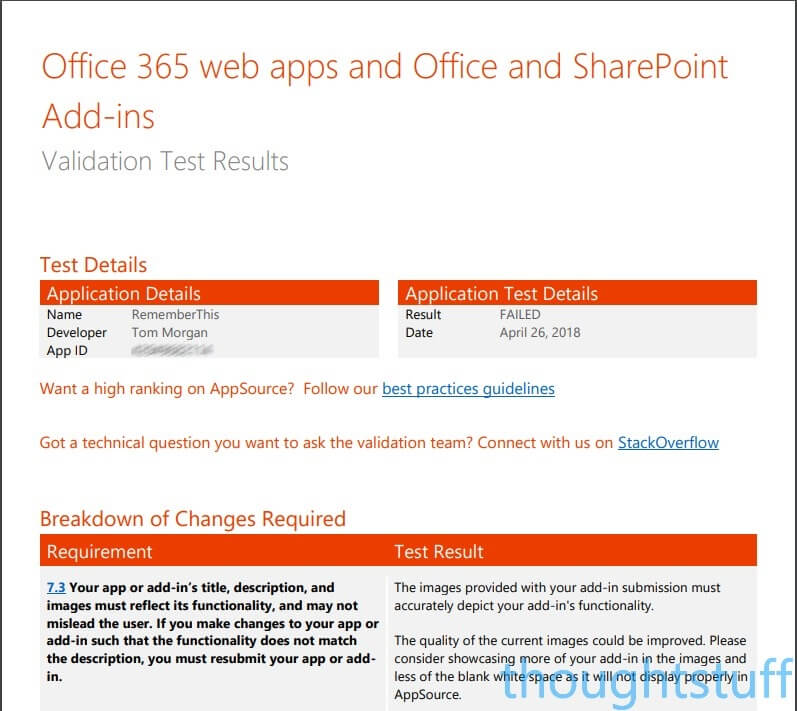
The report is a PDF file which you can download for reference. Be aware that if you go back to your app in the Dashboard and start making changes, you reset the status to Draft and won’t be able to access this report again, so take a copy now!
The test report is well laid out, with plenty of information about the result, and why. Here’s the start of my report. You can see my first required change is regarding the screenshots I provided. The result clearly defines what is wrong, how I can improve it, and links to more information.
I mentioned earlier that your app will be reviewed by both the Office Store team and the Teams product group, however, there’s no automatic submission of your app from one to the other, so until you ask the Teams product group to review your application, the Office Store team will flag it as “untested”. You’ll receive this test result:
Your app was rejected because it has not yet passed the Teams-specific guidelines described here: http://msteamsdesignguidelines.azurewebsites.net/#!/ Please email this report and your manifest file to teamsubm@microsoft.com for further resolution steps. Please note that the Office Validation Team cannot provide any support for this topic and will not validate any further resubmissions of your app until you have engaged with the Teams app support team over email.
This integration could be better, but it’s not too bad. Basically, you now have to email the address quoted with a copy of your manifest file (the zip file, not the JSON) and a copy of the test report, and ask them to validate it.
Again, I found this team to be very responsive and detailed in their reply. Within 24 hours I had a personalized reply and it was clear that my app had been put through its paces. Any issues had been clearly articulated, along with recommended steps to take. This is what App Store submission should be like: your app is being tested and validated by people who clearly know exactly what they are doing and are committed to working with you in the best interests of the App Store. They don’t feel like gatekeepers trying to find reasons to reject, it really does feel like they’re doing their best to help get your app into the Store.
There’s no point in re-submitting your app until you’ve got the go-ahead from the Teams team. Once they’re happy then they will mark your application as having passed, so that the Office Store team know. Provided you’ve also addressed any issues that the Office Store team have, re-submit your application by going back to the Seller Dashboard and clicking “Submit Draft for Approval” again.
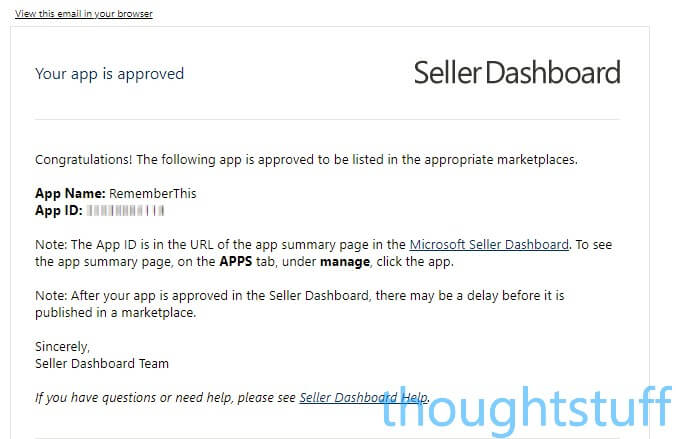
Approved!
What you’re waiting for is an email from the Seller Dashboard Team, letting you know that your application has been reviewed:
From this point, it can still take a few days for your application to trickle down to the App Store in all regions. It’s worth waiting and double-checking that your application is showing in the App Store before you start telling everyone about it!
Hopefully, that’s been a useful blow-by-blow of what it takes to publish an app into the Teams App Store. If you still have questions, let me know in the comments and I’ll do my best to answer them.
Written by Tom Morgan
 Tom is a Microsoft Teams Platform developer and Microsoft MVP who has been blogging for over a decade. Find out more.
Related posts:
 Developing with Microsoft Teams: Applications & Manifests
Introducing RememberThis: a new, free app for Microsoft Teams to make you look good all day long!
Developing with Microsoft Teams: Applications & Manifests
Introducing RememberThis: a new, free app for Microsoft Teams to make you look good all day long!
 Why Microsoft Teams isn’t in the Windows Store (yet)
Microsoft Teams now works with Botkit, what this means for Developers
Why Microsoft Teams isn’t in the Windows Store (yet)
Microsoft Teams now works with Botkit, what this means for Developers
 Weekly Update 6 May 2018: By the numbers – 1 Weekly Update, 2 Store Improvements, 34 new Microsoft Teams features
Hey Tom, thanks for posting this blog article. I was interested if you could say something about downloads and engagement for your app, what could one expect? Was it worth it? Thanks!