

In part 1 of this series, we introduced the Healthcare Bot, ran through some of the key features and costs, and showed you a working version of the bot. In part 2, we covered how you can install the Healthcare Bot in your own tenant. In this post, we’re going to look at some of the ways you can configure the Healthcare Bot to make it applicable to your own service.
Medical Configuration
To change these settings, first navigate to the Bot’s Management Dashboard. You can get to this by finding the Bot in your Azure portal, selecting it and then choosing the Manage Account link.
Mouse over the cogwheels, and choose Medical from the menu.
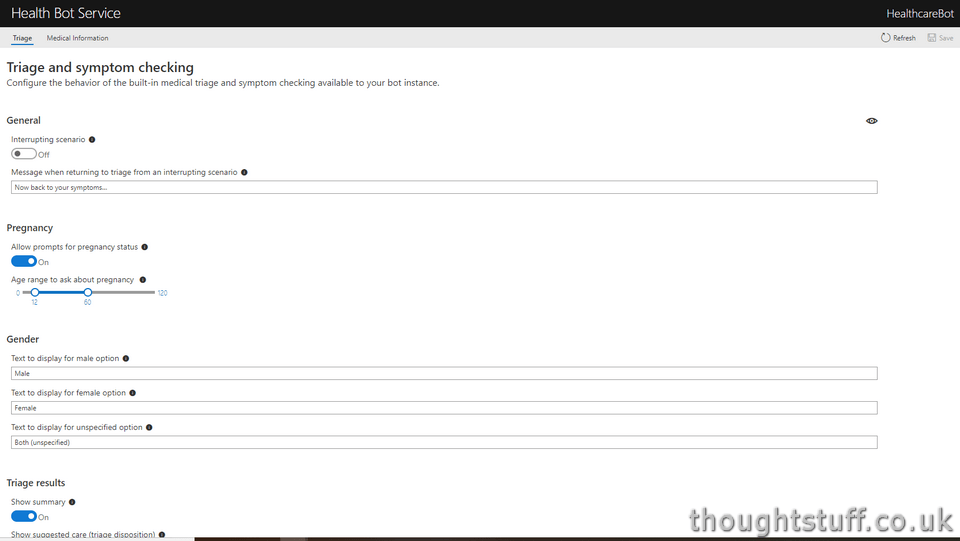
There are two tabs: Triage and Medical Information. Within the Triage tab you can change how the Bot performs the triage, for instance deciding whether to ask about pregnancy, what terminology to use for gender, whether to show the full triage results, how many possible causes to display etc. The Medical Information tab allows you to configure the wording for various outcomes to make sure they are appropriate to your users.
Compliance Configuration
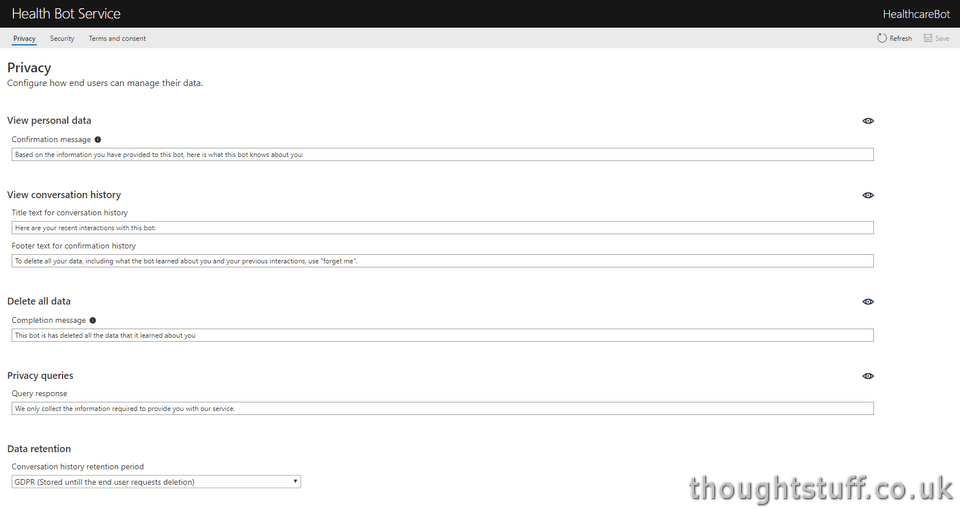
Choosing Compliance from the cogwheel menu allows you to change various compliance settings. There are three tabs. The first one deals with Privacy and allows the wording for various privacy-related functions to be configured. It’s good to see that the ability to be forgotten has been built right into the Bot. There is also a Data Retention setting to allow you to select what data retention period you want to use: either GDPR-mandated or HIPPA-mandated.
The Security tab allows you to set the timeout window that the Bot will keep a conversation open for. It’s possible as well to force end-user authentication for all interactions with the Bot.
The Terms and Consent tab lets you specify your own URLs for Terms of Service and Privacy. There is also the option to require a user to accept the terms before continuing.
Conversation Configuration
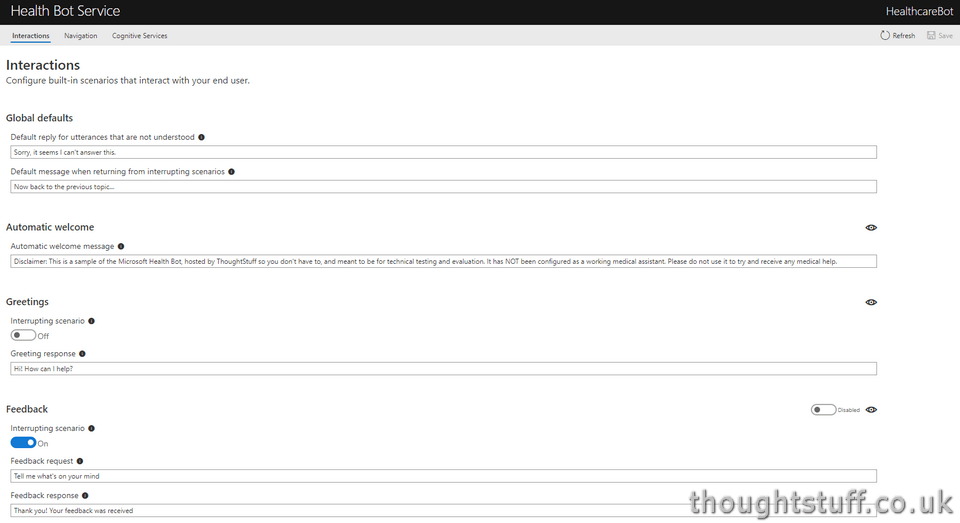
Choosing Conversation from the cogwheel menu covers a lot of the interactions users will have with your Bot. There are 3 tabs. The first one, Interactions, covers things like welcome messages, feedback, and defaults for when the user isn’t understood. All these responses can be configured – it’s possible to really give your Bot the character you wish. The Navigation tab lets you change how the Help feature appears to users – including the quick commands to actions such as listing out what the bot knows about you, previous interactions etc. The Cognitive Services tab includes default messages for when phrases aren’t quite understood.
Localization
By default, the Bot speaks in English, which is the only locale that’s installed by default. It’s possible to add others though by navigating to Language (the speech bubble icon) -> Localization:
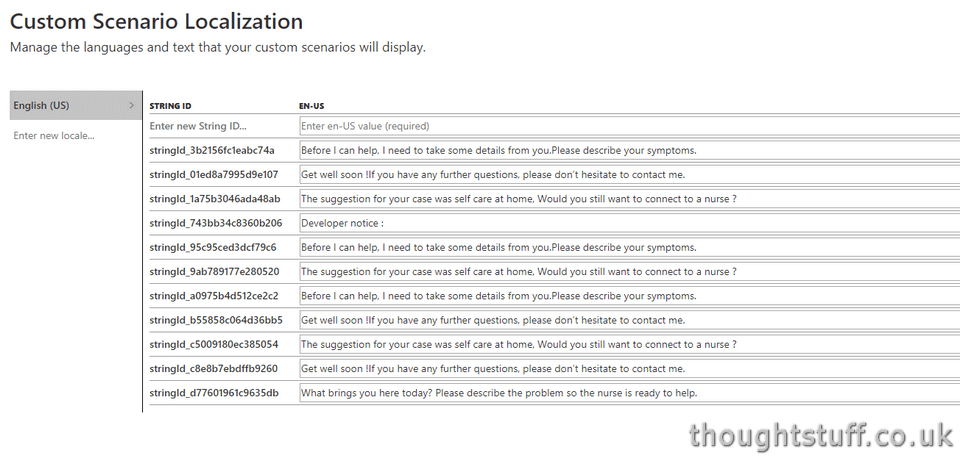
You can either add your own locale… or if you want to keep with the English (US) locale you can edit these default texts to personalize your Bot further.
Scenario Customisation
The Healthcare Bot comes with some default template scenarios, each of which can be customised to match the desired workflow. Clicking Scenarios -> Manage and selecting the scenario to edit will open the Scenario Editor:
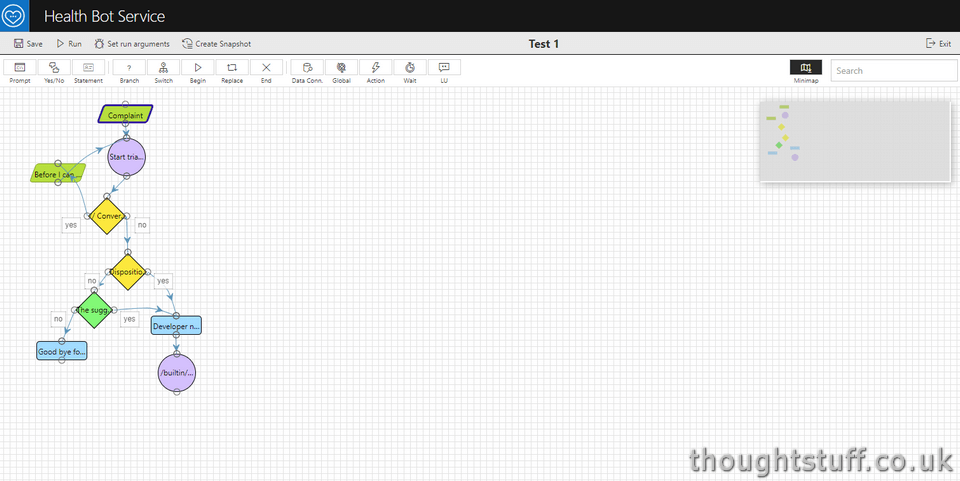
This lets you add new sections to the existing workflow, or even completely change how the scenario work.
You can also drop from the designer view to the code view. This can be easier to change how some parts of the scenario work.
By default, the handoff scenario includes the ability to connect to a nurse or other human professional. The Healthcare Bot comes with a sample framework to support agents connecting to the service, seeing users which are waiting to speak to an agent, and then connecting them:
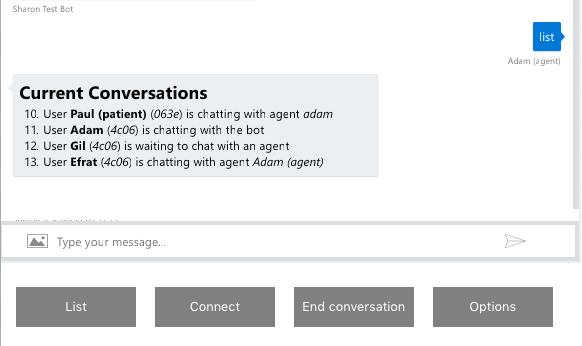
For more information about this, including steps to deploy, see the Microsoft Docs page:Â Handoff overview.
These are just some of the ways you can configure the Healthcare Bot to make it appropriate for your scenario. As you can see, there are many ways you can shape how the Bot acts and behaves, as well as the tone and character it presents to users.
Want to know more?
This is part 3 in a series of posts (which start here) about the Microsoft Healthcare Bot. If you want to know more about how to deploy the Healthcare Bot in your own website then look out for the next post, coming soon. You can subscribe to the newsletter and I’ll email you weekly with a summary of posts. Or there’s an RSS feed, YouTube channel, Podcast, Twitter… you get the idea.
Related posts:
 Microsoft Healthcare Bot: Part 2 Installing the Healthcare Bot
Microsoft Healthcare Bot: Part 1 Introducing the Healthcare Bot
Microsoft Healthcare Bot: Part 2 Installing the Healthcare Bot
Microsoft Healthcare Bot: Part 1 Introducing the Healthcare Bot
 Weekly Update 7 December 2018: Edge, Healthcare Bot, Facial Recognition
Weekly Update 15 December 2018: Healthcare Bot, Teams overtakes Slack, Flow in Teams, What makes Microsoft tick?
Weekly Update 24 June 2018: Can Microsoft Teams be used in healthcare to improve patient communication? My thoughts.
Weekly Update 7 December 2018: Edge, Healthcare Bot, Facial Recognition
Weekly Update 15 December 2018: Healthcare Bot, Teams overtakes Slack, Flow in Teams, What makes Microsoft tick?
Weekly Update 24 June 2018: Can Microsoft Teams be used in healthcare to improve patient communication? My thoughts.