This is the fourth in a series of 5 blog posts and videos around Declarative Agents for Copilot:
In part 1 I talk about what Declarative Agents with API plugins are and how they fit in to the Microsoft 365 developer stack alongside other technologies.
In part 2 I cover the prerequisites required and the work you need to undertake before you can start.
In part 3 I introduce my demo application, and walk you through it.
In part 5 I cover off the gotchas, tips & other things that I learnt along the way.
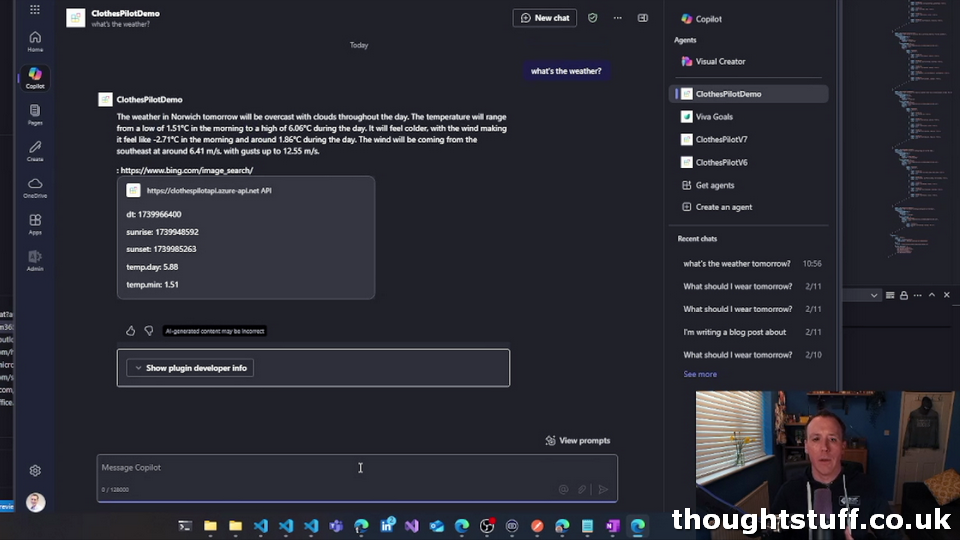
In this blog post I’m going to go through the actual process of building a Declarative Agent, assuming you have all the prerequisites from part 2 in place. If you follow along then by the end of this post you’ll be running your own Declarative Agent. The screenshots below are taken from the video above.
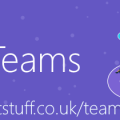
We start in Visual Studio and the Teams Toolkit:
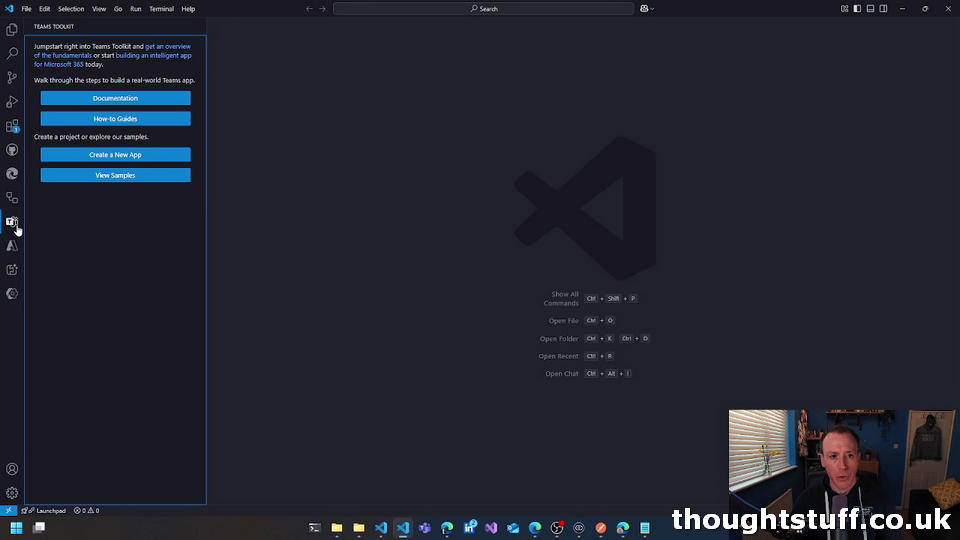
Use the Toolkit to Create a New App, and choose to create an Agent:
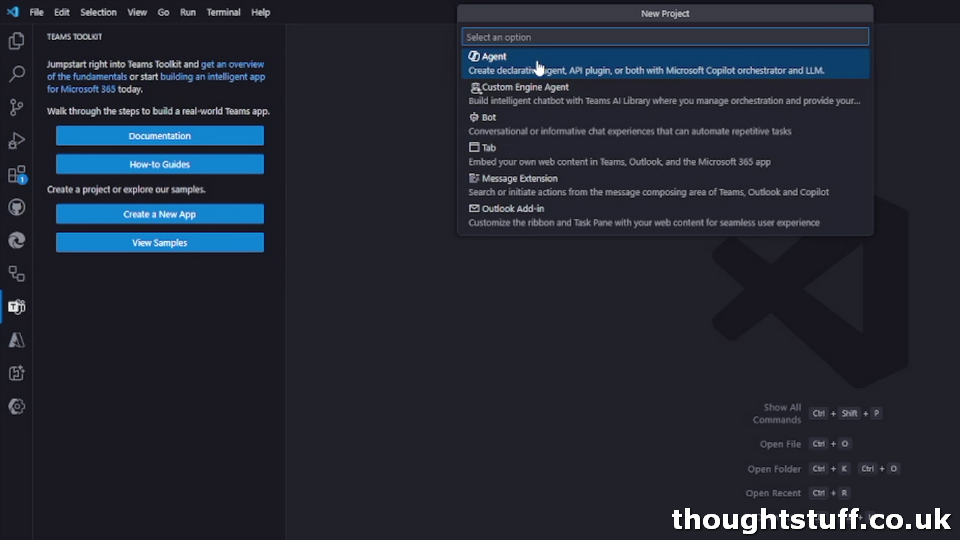
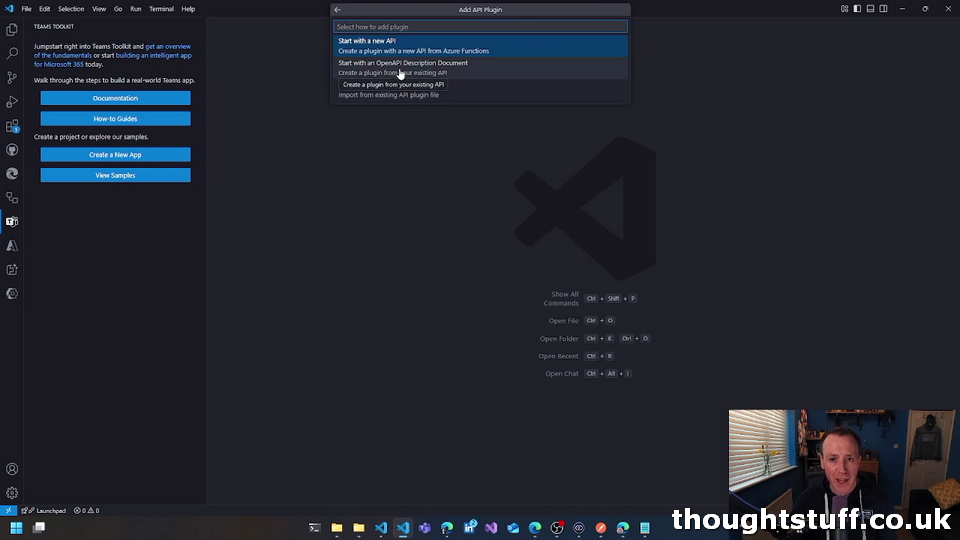
We then want to choose the option for Declarative Agent, and then Add plugin to ensure we create an agent that can support an API. We already have our API so at the next step choose Start with an OpenAPI Description Document:
You’ll then be prompted to provide your OpenAPI document, which you can do by clicking Browse path and navigating to your schema document.
You’ll then see a representation of your API in the API Explorer:
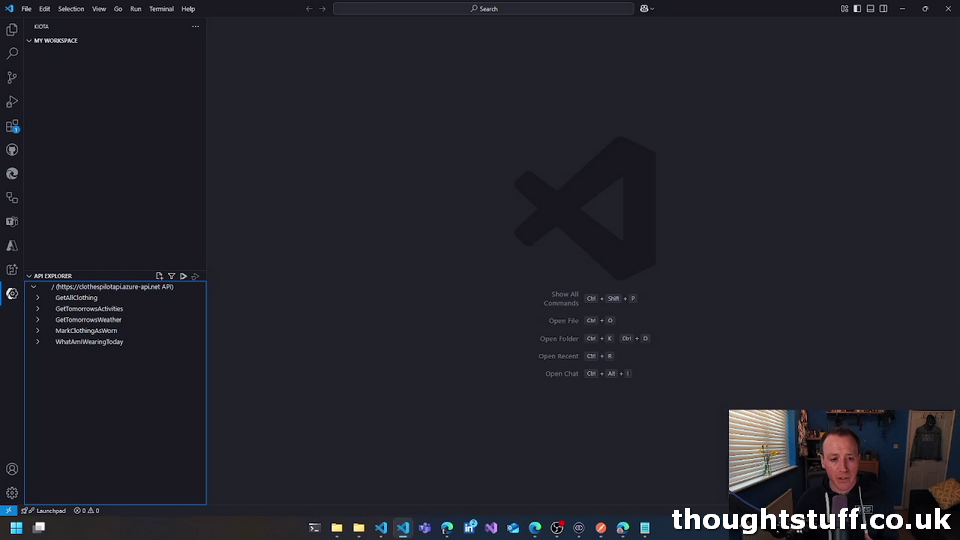
You can tick them methods that you wish to include for use with your Declarative Agent (DA). If you’ve created an abstraction API to use with your agent then you might just choose them all, but if not then make sure you’re selective about which methods you include. Include as many as your agent will need, but no more.
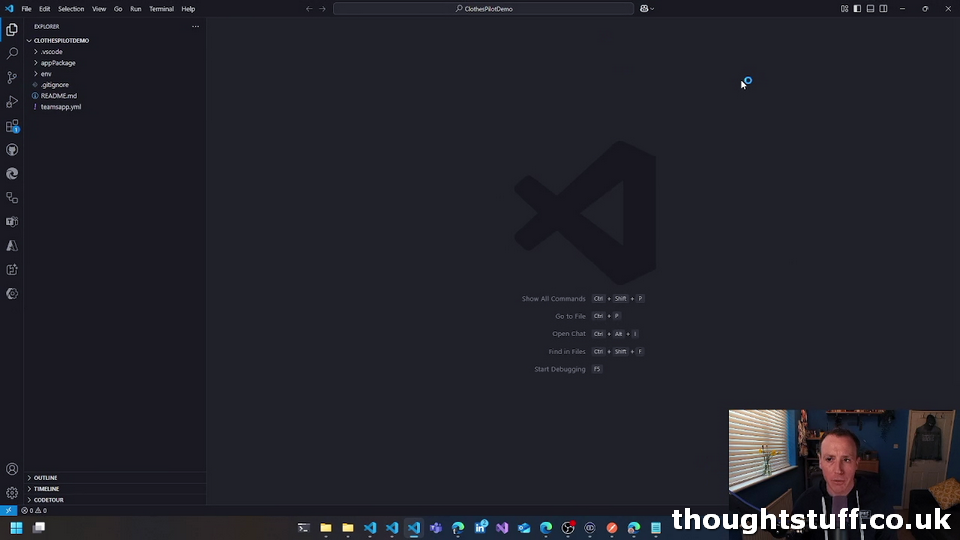
Once you’ve done this, click Generate in the toast that’s bottom-right, choose a location for your new project, and type an application name. Visual Studio Code and Teams Toolkit will then scaffold your DA project:
There are a few things you should do now.
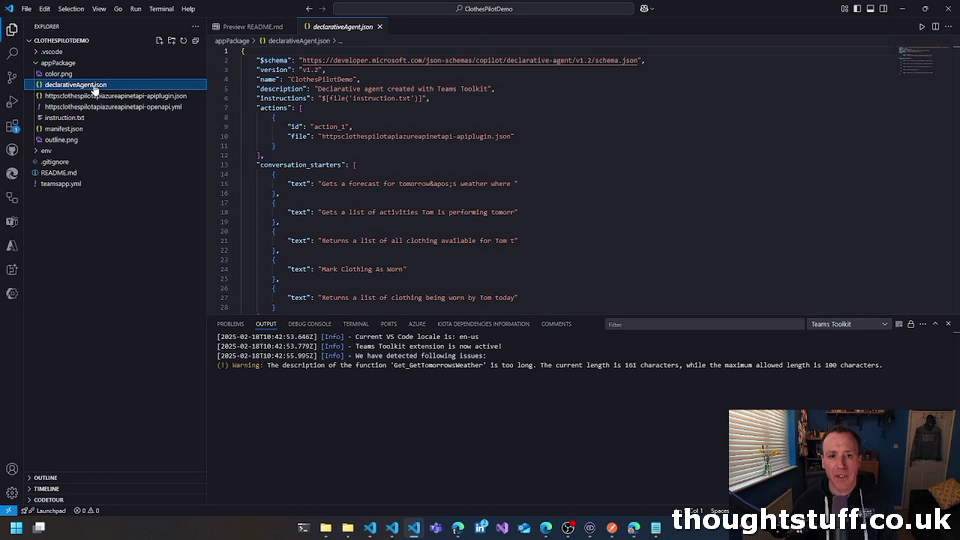
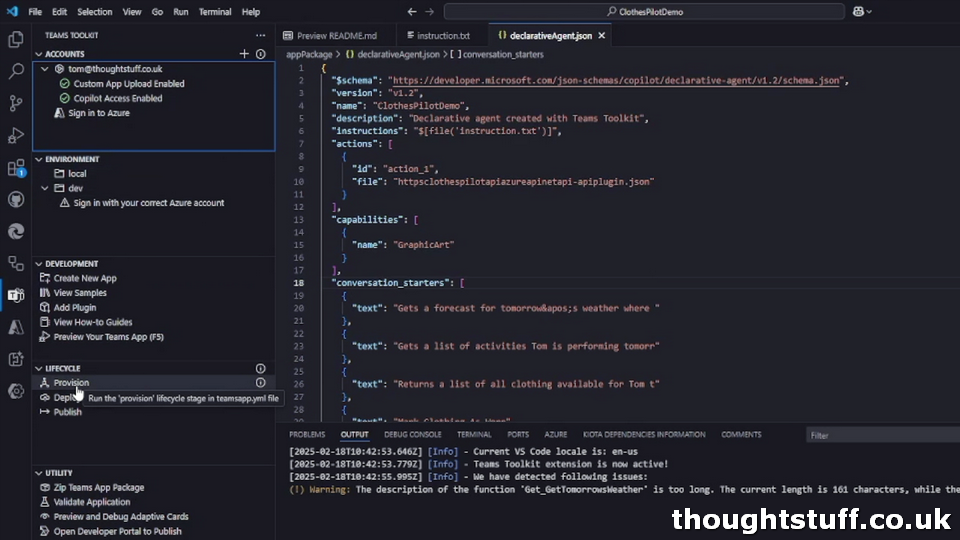
From inside the /appPackage folder, review the declarativeAgent.json file. This contains the name and description of your DA and some conversation starters. You should change these to match your application. This information will be shown to users so make sure it is clear and unambiguous.
You can also choose to add some additional functionality to your DA, through the use of capabilities. Supported capabilities today include GraphicArt, which will invoke Microsoft Designer to generate an image, and CodeInterpreter which can perform complex math functions, draw graphs and even create word clouds for you. You add these using a “capabilities” array added to your declarativeAgent.json file:
{
  "capabilities": [
    {
      "name": "GraphicArt"
    }
    {
      "name": "CodeInterpreter"
    }
  ]
}
The other file to update is the instruction.txt file. This is your system prompt, and is probably where you will spend most of your time, fine-tuning the prompt for your application. As well as the prompt for your application you can also provide any instructions to the capabilities, for instance “when creating images, always make them cartoon style”
Provisioning & Testing
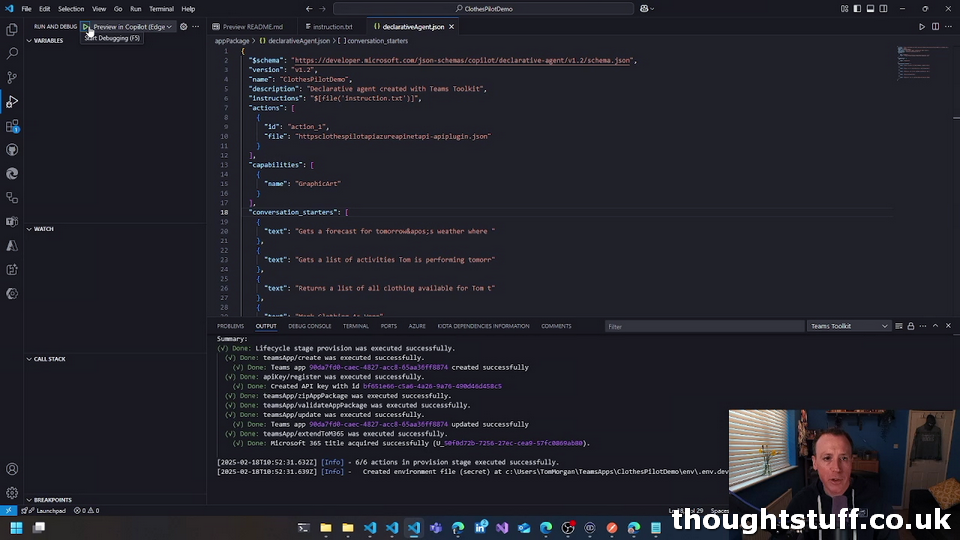
At this point, you’re basically done! All that’s left is provisioning and testing.
To provision, you again use the Teams Toolkit, selecting the Provision menu option from within the Lifecycle section. This will do all the back-end setup work nessecary to support your DA such as creating a new application registration and packaging your DA into a Teams app.
If your OpenAPI schema contains an authorisation section (because your API requires authorisation) then you will prompted to enter an API key at this point. This can be easy to miss – it’s at the top of the screen and isn’t obvious if you’re watching the console output.
When you enter your API key it does not get packaged with your Teams app (that would be a security risk). Instead it is added to a key store, accessible via the Teams Developer Portal. A reference ID to the key store is stored in the packaged version of the app, so if you ever need to update the key, use the packaged version of the app, look through the manifest for a reference to the API key, and then use that ID in the Teams Developer Portal to find which key you need to update.
Once provisioning in complete, you’re ready to test your application. Click the Run and Debug section of the main VS Code sidebar and then click the play button to “Preview in Copilot”:
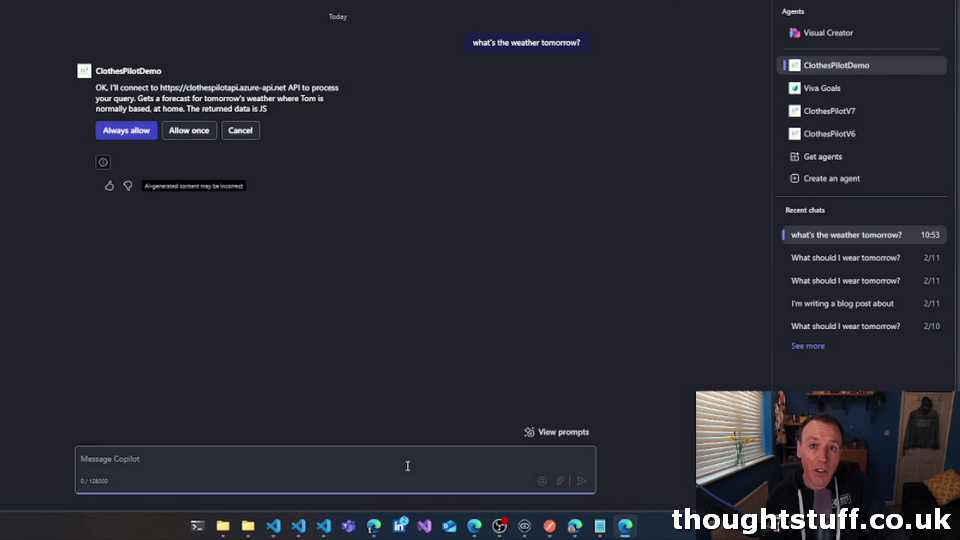
This will open a new browser window and take you directly to the Copilot chat experience. You’ll notice that your DA is listed as an Agent. Select it, and you’ll see the conversation starters. At this point you can start to interact with your application.
The first time Copilot decides to call one of the APIs in your DA, the Copilot user will be asked to confirm, using the description of the method provided in your OpenAPI spec file:
If you’re not getting quite the results you’re expecting, check out part 5 in this series, where we go through some gotchas as well as some tips for success.