


Microsoft Healthcare Bot: Part 4 Deploying on your Website
In part 1 of this series, we introduced the Healthcare Bot, ran through some of the key features and costs, and showed you a working version of the bot. In part 2, we covered how you can install the Healthcare Bot in your own tenant, and in part 3 we looked at some of the ways you can configure the Healthcare Bot to make it applicable to your own service. In this final part, we’re going to cover how you can deploy the Healthcare Bot within your own website.
It’s not immediately obvious how you can take the Healthcare Bot and present it to patients, or embed it within an existing website. The embedded web chat lets you test the bot as you’re setting it up and configuring it, but after you’ve done that how do you get it into the hands of users?
The easiest way is to deploy a dedicated Web App containing the code to host your Healthcare Bot. You could either use this as the place users go to (for instance: chat.mymedical.com) or embed it using an iframe, similar to what I did in part 1.
Microsoft has made available a simple container for the Healthcare Bot, available via GitHub. There’s a Deploy to Azure button as well, which is the easiest way to get the Web Container running in your tenant.
Clicking the Deploy to Azure button takes you here:
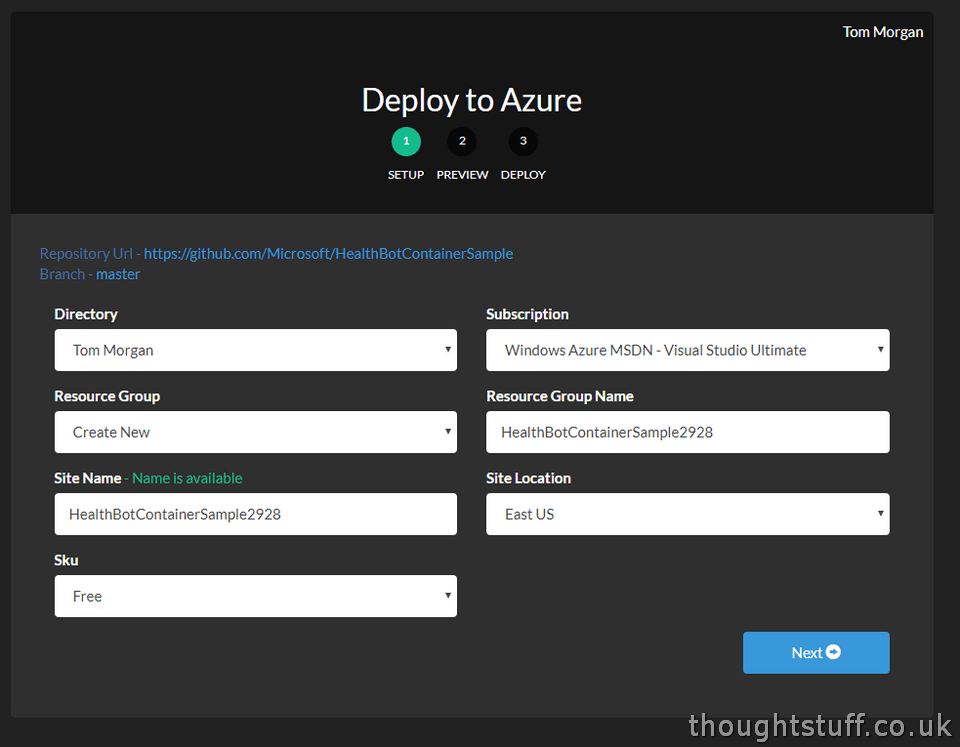
This is a convenient way of automatically deploying the code from the GitHub repository into your Azure tenant, setting any needed configurations along the way.
Review that the Azure Directory and Subscription are correct, and either choose an existing Resource Group or create a new one. Review the other settings and when you’re happy click Next.
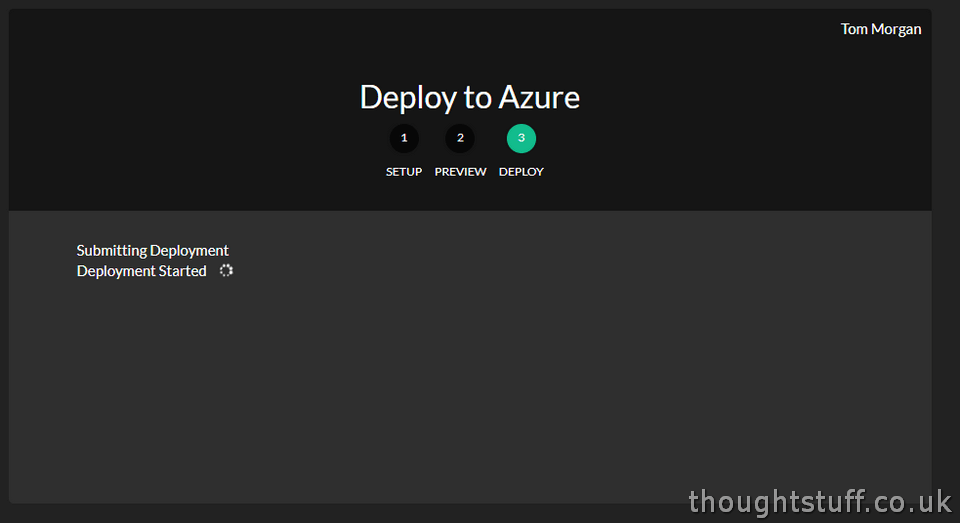
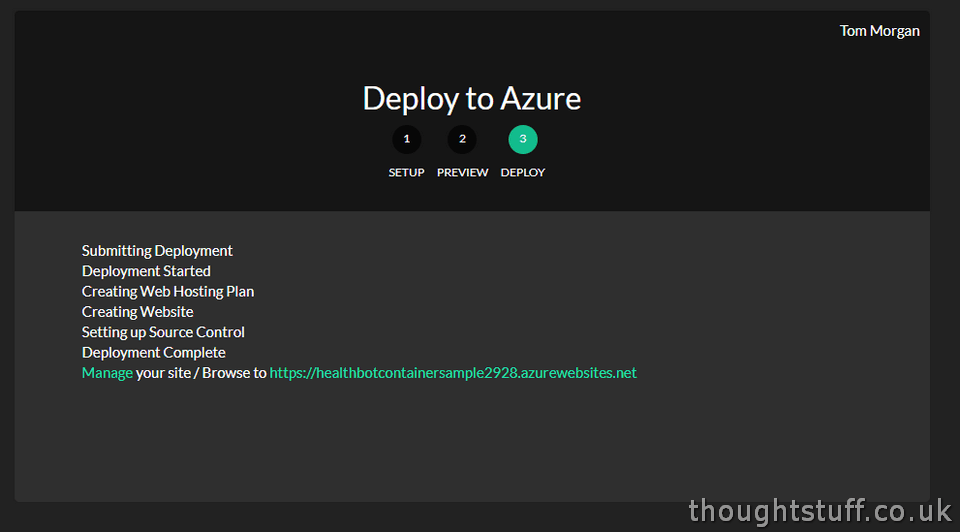
You’ll be shown a breakdown of what’s going to be created in your Azure environment for review. Click Deploy to actually deploy these. The deployment will take a few moments and you’ll be able to see the various steps that the deployment is performing:
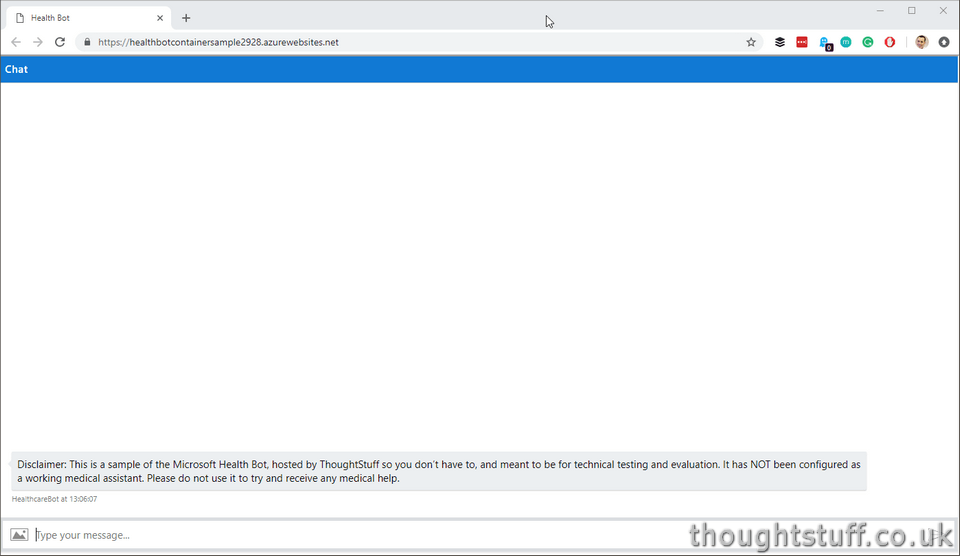
Once all the steps are complete, you’ll see two links – one to visit your site and the other to manage it:
If you open the site now, you’ll find that it doesn’t really do anything. That’s because we haven’t yet associated the site with our Healthcare Bot instance, so it doesn’t know what to show.
To do this, click the Manage link to jump to the website resource in Azure. Whilst that’s loading, open another tab and navigate to your Healthcare Bot (don’t have one yet? see part 2!).
Mouse over the Integrations icon (two arrows) and choose the Secrets link:
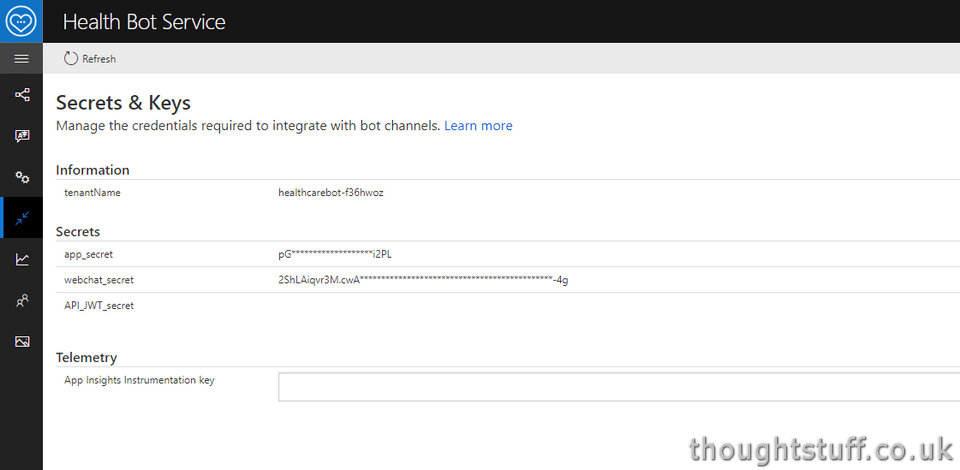
Make a note of both the app_secret and webchat_secret values.
Go back to the Azure Management page for the newly created website (by clicking Manage from the Deploy to Azure page, or finding it in your Azure tenant). From the Settings section, click Application settings. Scroll down until you see the Application settings
Click on + Add new settting. For the App Setting Name, enter the value: APP_SECRET. For the value, enter the value of app_secret from the Healthcare Bot Secrets page.
Repeat to add a second setting, WEBCHAT_SECRET with the value of webchat_secret.
Click the Save button at the top of the page, and then refresh the website. Now, you should see a full-screen webchat window:
From here, you can either embed this as an iframe, or download the website code from your Azure WebApp and start modifying it, for instance by surrounding it with a title, styling, instructions etc.
Written by Tom Morgan
 Tom is a Microsoft Teams Platform developer and Microsoft MVP who has been blogging for over a decade. Find out more.
Related posts:
 Microsoft Healthcare Bot: Part 2 Installing the Healthcare Bot
Microsoft Healthcare Bot: Part 1 Introducing the Healthcare Bot
Microsoft Healthcare Bot: Part 2 Installing the Healthcare Bot
Microsoft Healthcare Bot: Part 1 Introducing the Healthcare Bot
 Building an FAQ Bot using Azure and QnAMaker without writing any code: Part 3
Microsoft Healthcare Bot: Part 3 Configuring
Building an FAQ Bot using Azure and QnAMaker without writing any code: Part 3
Microsoft Healthcare Bot: Part 3 Configuring
 Weekly Update 15 December 2018: Healthcare Bot, Teams overtakes Slack, Flow in Teams, What makes Microsoft tick?