Giving a great remote presentation: 3 tips using OBS I’ve learnt in the last 12 months
I don’t claim to be an expert on OBS by any means, but in the last 12 months I’ve learned loads more about it than I did before. I wanted to tell you about 3 things I’ve done to improve the quality of remote presentations I’ve been giving.
Before we start
If you don’t know what OBS is, well this blog post might not yet be for you. OBS is like a real-time editing studio for your audio and video – enabling you to mix in real time and really control the output you then send to the presentation. It has a built-in virtual cam, meaning that you can select it as a “camera” in Microsoft Teams, Zoom or your favourite presentation software. If it sounds interesting – there are a thousand video tutorials on setting up and using OBS. The one I started with was Scott Hanselman’s one (you don’t need to buy an Elgato StreamDeck if you don’t want to – I haven’t yet!)
Tip 1: A better screen-sharing screen
Lots of presentations involve showing the content of your screen. Different conferencing platforms display this in different ways, but often it involves either removing or minimising your video. That’s not a good way to maintain a viewer’s attention though – you want to continue to maintain eye contact with them whilst you’re talking. Endless presentations without video can be really draining to consume. Ideally, you want to flip between the presentation content and your video to keep the attention: just like they do on TV news.
That’s hard to do in your conferencing software without lots of lag and delay, but it’s really easy to do in OBS. By setting up a few different scenes you can easily transition between video and screenshare – and it all gets sent through the Virtual Camera and appears as if it’s all your video feed when viewed in Teams or Zoom etc.
The real tip here though is that your “screen sharing” scene shouldn’t just be the screen you want to present – it should ALSO have your video on it, like this:
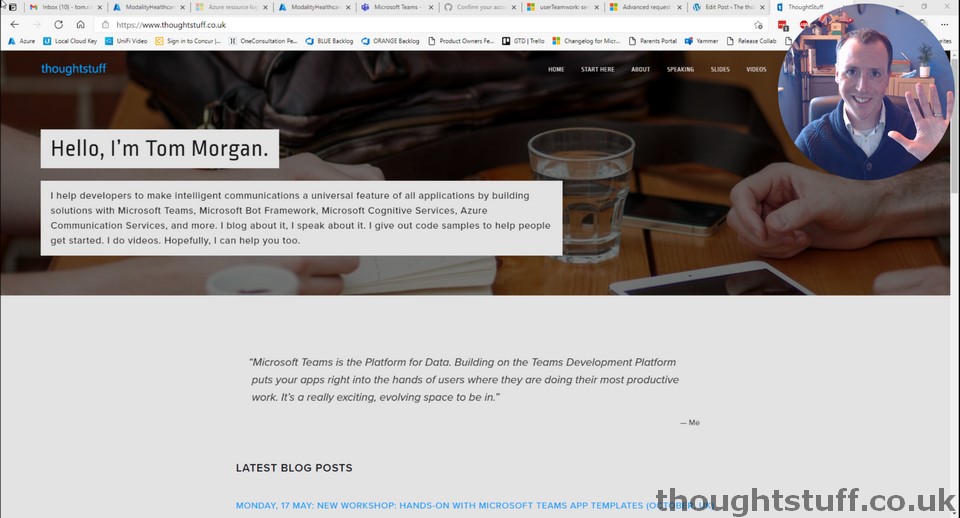
Notice how my video is in the top-right, meaning that I can present the content of this screen whilst still maintaining eye contact. Of course, that’s just one sort of layout. I also have another one, more suited to slide decks:
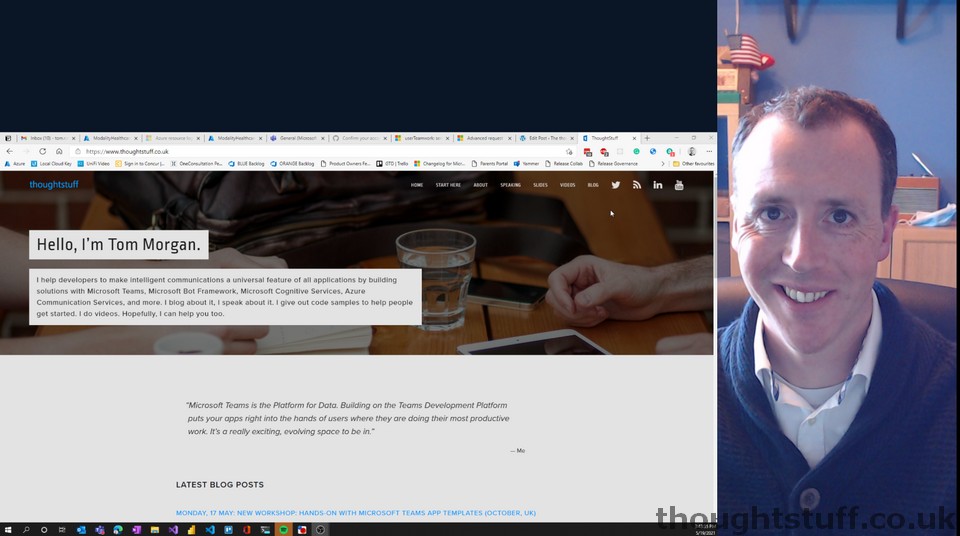
This keeps the slides nice and prominent whilst also giving me the largest possible amount of screen space for video.
It’s worth spending some time playing around with different layouts to see what works for you. By the way, the rounded video is done using an “Alpha Mask” filter in OBS. Here’s the tutorial I followed: How to Create an Image Mask in OBS.
Tip 2: Improve your audio
You should be using a decent microphone when you present. I have a Blue Yeti, but I wasn’t doing anything fancy with it – I just plugged it in and started using it. That’s fine… but there is so much more you can do!
On top of all the video features OBS has, it also has lots of audio features too. You can add “filters” to incoming audio to do clever things like EQ, noise gating, expanding etc. If you don’t know what these things are, don’t worry. Neither do I. They are just algorithms to change how your voice sounds which make it sound better.
OBS has support for VST 2.x plug-ins. Don’t worry, I didn’t know what they were either until a few weeks ago. It’s a common standard for Virtual Studio Technology, used in both commercial and free software under license. There’s an entire community of amazing people creating incredible plugins to do all sorts of things, most of which I don’t understand.
I am 100% not the right person to instruct you in setting up OBS so that your audio sounds better – I’m just telling you that should consider doing it. Here are two excellent videos I used.
Firstly, watch this video but don’t make any changes in OBS. This is a good video for showing you what you can do with OBS, but you’ll get to the end of the video wishing you knew which VST plugins to use, and wondering if there are any good free ones.
Then, once you’ve watched the first one, watch this video which tells you exactly which VST plugins to get, and also exactly how to configure them even if you don’t know what you’re doing. I blindly followed everything in this video, and now my audio sounds GREAT!
Tip 3 – Multiple Machine Demo Setup
My last tip is for you, if you give a lot of demos that involve making calls or joining meetings. Those are really hard to do whilst actually on a call. VMs don’t help much because calls tend to require real USB devices for audio/video before they will work. The best approach is a separate machine to demo on, but then how can you get the output from that machine into your presentation? You could video it, but then it’s not a live demo…
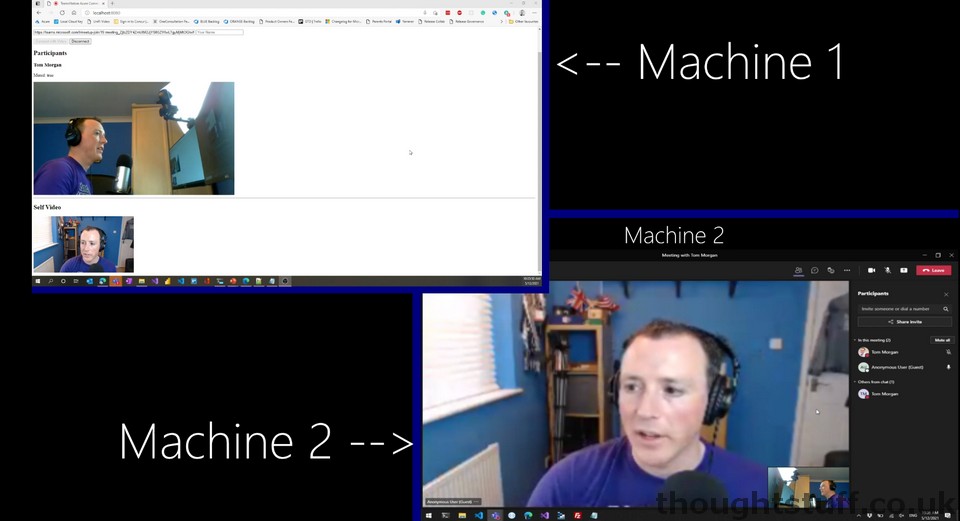
I found a great workaround, using an HDMI capture card, and OBS. An HDMI capture card is a bit of hardware that accepts HDMI in, and outputs USB. You plug it into your second machine as if it was an external monitor, and plug the USB port into your primary computer. It shows up as a regular camera device, so you could use it directly in your conferencing software, but also you can use it in OBS. I used a 2016 Magewell device, but plenty of others exist.
This is a game-changer for demos because now you can switch to a second computer to show something, or even show both monitors side by side!
If you’re already using OBS, hopefully, these tips are useful and cover areas you haven’t yet explored. If you’re not yet using OBS and are thinking about how to improve your presentations (or even just regular meetings) then I hope this post has given you plenty of things to think about and research. Happy presentation modding!