Developing with Microsoft Teams: Applications & Manifests
[contemplate-3]
In this post we’ll look at some of the high-level concepts that it’s worth understanding before digging into the code.
It Starts with Apps
Whatever type of development you choose to do in Teams you’ll need to become familiar with the concept of an App. An App is essentially the distribution container for your code. It’s how users add your work to their Teams instance. That means that everytime you write some Teams code you need to package it up into an App, using some basic rules.
There’s an upside to this as well. In a decent-sized solution that does more than very simplistic tasks, it’s likely that your solution will contain more than one type of development. For instance, you might have a bot which users begin their conversation with, but also a tab to show more information (we’ll cover both of these later). You can wrap all of these different things into a single App, making it easy for users to consume.
Apps are also the things you submit to the App Store (duh!) to make them discoverable for others. However, when you’re just starting out, playing around, or making something you want to keep internal then you might not want to submit your app to the App Store just yet. There’s an alternative method of making Apps available for these use cases: sideloading.
Sideloading is a process where you can install your App directly, without going through the App Store. Typically used by developers whilst testing out their work you can also use it to install any apps which aren’t yet published to the App Store. However, unless you wrote the App yourself (or you know the person who did) you should treat with suspicion any Apps which aren’t offered through the App Store, which protects you by reviewing every submitted app.
So, before you can start developing anything for Teams, you need to be able to put together an App. Let’s look at that now.
Anatomy of a Teams App
An App is contained as a zip file. Within that, there are a number of important files which define it. Firstly, there are two image files. These are used within Teams to identify your application. One is 96 pixels square, the other is 20 pixels square. When you’re sideloading apps, you must have both of these icons present.
Secondly, there is a JSON file, called manifest.json. This contains all the definition information about your application. There are a number of required values which you have to include in your manifest:
- ManifestVersion – right now there is only one version of the manifest, so this value should always be “1.0”
- version – this is your version number.
- id – this is a unique GUID for your application, and should match the application ID of your application in the App Registration Portal. See the following section for more information on this
- packageName – this is a unique, reverse domain notation name for your application
- developer – there is some required information you have to provide regarding who you are. Your name, plus URLs to your website, privacy policy and terms of use are all required.
- name – the name of your application which is shown to users. There is both a short and full name field, because the short field is limited to 30 characters.
- description – similar to the name fields, there is a short and full description field. The short field is limited to 80 characters
- icons – as previously explained, you need to provide both a 96×96 and 20×20 image for your application. The outline field is for the 20×20 icon, the color field is for the 96×96 icon.
- accentColor – a hex code value starting with #, which is used by Teams to identify your application and provide some consistency between applications.
Notice how none of these fields describe any specific type of development option – they are common to all of them and define general information about your application. They’re required for every application you write.
Here’s a sample manifest file. It won’t actually do anything, but it contains all the required fields. You can use it as a starting point when making applications, and then add in extra information specific to your solution:
{
“$schema”: “https://statics.teams.microsoft.com/sdk/v1.0/manifest/MicrosoftTeams.schema.json”,
“manifestVersion”: “1.0”,
“version”: “1.0.0”,
“id”: “YOUR_MICROSOFT_APP_ID”,
“packageName”: “uk.co.thoughtstuff.sample”,
“developer”: {
“name”: “ThoughtStuff Developer”,
“websiteUrl”: “https://thoughtstuff.co.uk/”,
“privacyUrl”: “https://blog.thoughtstuff.co.uk/privacy.html”,
“termsOfUseUrl”: “https://blog.thoughtstuff.co.uk/tos.html”
},
“name”: {
“short”: “ThoughtStuff Sample App”,
“full”: “ThoughtStuff Sample Application”
},
“description”: {
“short”: “Sample manifest definition example”,
“full”: “Sample manifest definition example”
},
“icons”: {
“outline”: “thoughtstuff-20x20px.png”,
“color”: “thoughtstuff-96x96px.png”
},
“accentColor”: “#60A18E”
}
As you start to build different types of Teams applications, you’ll build out this manifest.json file in different ways. In each blog post describing different development types I’ll cover what goes into the manifest, but if you’d like a full reference to have handy so you know all the different configuration options, there’s here on MSDN: https://msdn.microsoft.com/en-us/microsoft-teams/schema.
Microsoft App Registration Portal
When creating new Teams applications, the manifest requires you to specify a GUID for the application id. The id should be registered with the Microsoft App Registration Portal.
If your application contains a Bot Framework bot then you already have an App ID, created for you when you registered the bot in the Bot Framework Dashboard. Simply copy the App ID from there.
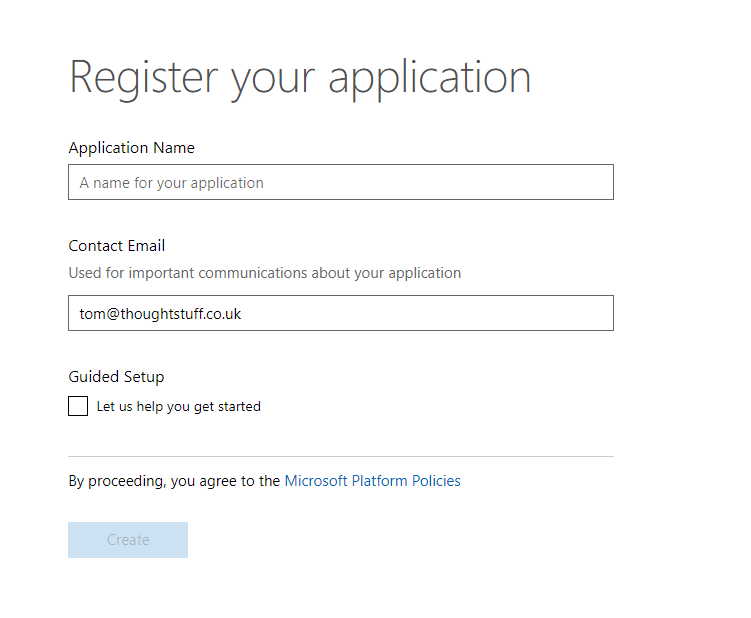
If you’re creating anything else that doesn’t include a bot then you can easily register a new application in the App Registration Portal. Go to https://apps.dev.microsoft.com and click Add. Provide some basic information (your name and a contact email address) and click Create:
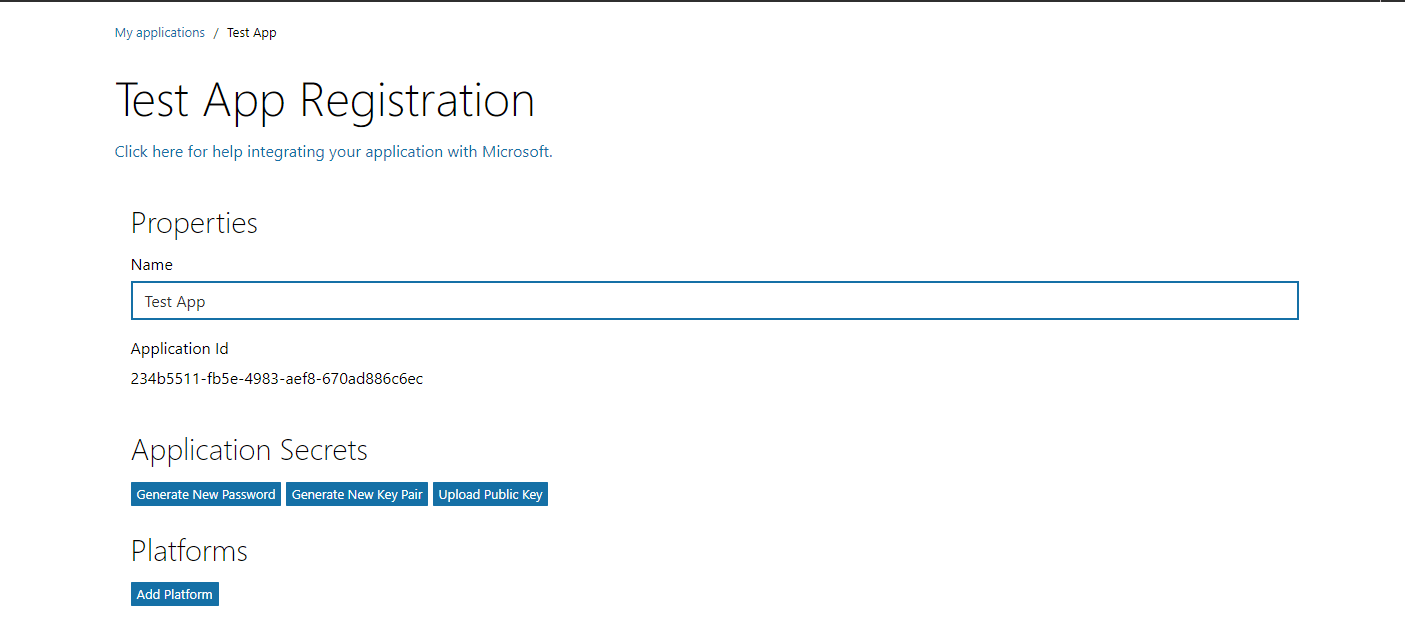
Once the application has been registered the Application Id is displayed on the screen. Simply copy it and use it as the id in your manifest.json file:
Packaging and Sideloading
Once you’ve filled out all the basic information about your application and anything specific to the type of development you’re including then you’re ready to package. Simply save your manifest.json file in a folder alongside your two images and create a new zip file containing all three files.
In the Teams desktop client, choose the Team you’d like to add the App to (apps are tied to a specific team). Click the Team name at the top of the client to show the list of Members, Channels and Apps, as well as Settings if you’re the Team admin:

Click Apps, then look for the link at the bottom right, “sideload an app”. Navigate to and select your zip file. At this point, Teams will perform a verification check of your deployment package and manifest.json file. The JSON syntax doesn’t leave much room for error, and there are many validation rules which are checked before your app is added. If anything is amiss, you’ll get a helpful message. For instance, all the website links in your manifest.json file must be https, any http links will get rejected, as in this screenshot below:

If everything goes well, then you’ll see your application listed on the screen. At that point, you’re all done and your application is succesfully sideloaded.
Now that we’ve covered apps, how to create, package and load them, we’re ready to look at the different types of development options available in Teams. We’ll cover that in the next blog post.


